Cutting and sewing technique
Lessons and articles on the nuances of cutting and sewing various types of women's and men's clothing with your own hands. Lessons for working with patterns, patternless cut, tips for beginners on how to sew a skirt, trousers, dress and other clothes. The articles are accompanied by free and paid electronic patterns. Examples of cutting with your own hands and sewing according to ready-made patterns.
How to reduce or increase the size of the pattern by 2 or more sizes
 Almost all of my ready-made electronic patterns are multi-sized, that is, they are designed and made not for one size, but for a gradation or range of sizes in one PDF file.
As a rule, this is a pdf file of a product pattern for small and medium sizes from 42 to 52, and patterns in a file for large sizes from 52 to 64. Which is convenient for tailoring to a customer whose figure combines two sizes, and this is very common. often. After printing and assembling such a multi-sized pattern of mine, it is easy to correct it for such not quite standard figures according to the individual measurements taken.
Despite the multidimensionality of my finished patterns, nevertheless, some subscribers have a question about how to increase the pattern, for example, to 68 or to 70th size, or reduce it to 38. In the article, we will analyze this issue using the example of a dressing gown, shorts, trousers and collars.


 I often hear the phrases “good pattern” and “it took a long time to fit the figure”, “like a glove” and “I still need to plant”.
Let's try to figure out which patterns always have a good fit, and which ones need to be adjusted, and how to adjust them to the individual characteristics of the figure.
Let's start with the fact that human figures are very diverse and, of course, products sit well on all figures without exception, in the design of which only parameters common to all figures are used.
Download pattern:

How to print a pattern
 You can print life-size patterns using the free Adobe Reader program.
This is a free program and can be downloaded from the Internet.
Upon launch, Adobe Reader prompts you to open files.
Vera Olkhovskaya
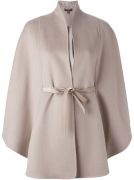
This material reveals the secret of the so-called "frame" - the most common way to process pockets, stitching loops and slits for hands in products such as a poncho cape.
It is no secret that for beginner tailors, it is the processing of pockets that is the most difficult.
So if this is your first pocket (loop or slit), do it on a piece of fabric.

Sheath dress patterns with raglan sleeves and waist pocket $2.50 |

Pattern "coat for beginners with a scarf" $1.50 |

Vera Olkhovskaya
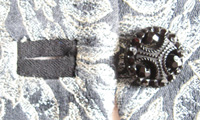
The clasp "drop" can be processed in two ways:
- edging
- turning
Vera Olkhovskaya
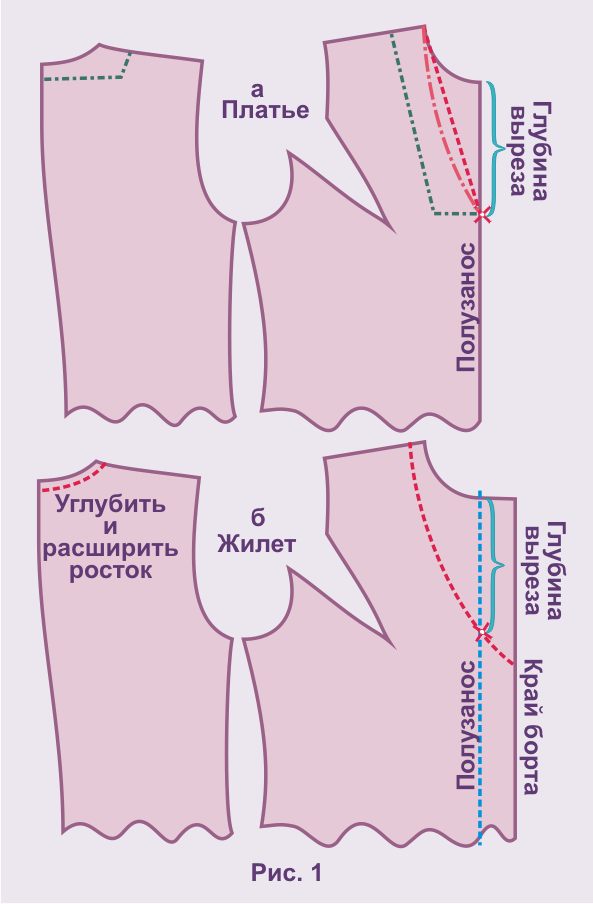
A drawing of any base (see. "Basics") involves a neckline, which in most cases is inconvenient and uninteresting.
You can change the style of the neck both on the fitting and on the pattern itself before trying on the product (video at the end of the article).
To do this, measure the desired neckline depth on the customer (see also "Removal of measurements").

Vera Olkhovskaya
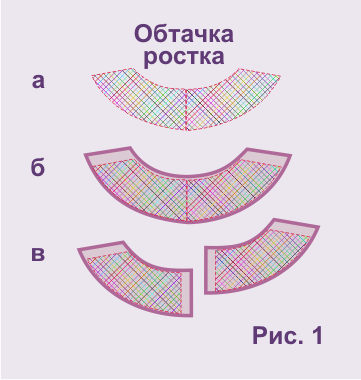
Quite often, the facings of the armhole or neckline do not fit entirely on the fabric.
You have to cut them out of small patches, which is a considerable difficulty even for experienced tailors.
Let's try to simplify this task as much as possible.
 Another very simple way to process the neck with an oblique inlay (see. "How to make a bias tape").
This method differs from edging in a simpler approach and is applicable to fabrics of any thickness and texture.
Restriction - the shape of the neckline: cape with a clasp or a seam in the middle, "circle", "oval".

Vera Olkhovskaya
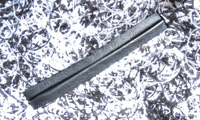
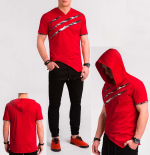
The set-in bar is one of the simplest and most common types of fasteners.
It can be used not only on T-shirts, blouses, windbreakers and dresses, but also in skirts instead of the traditional vent.
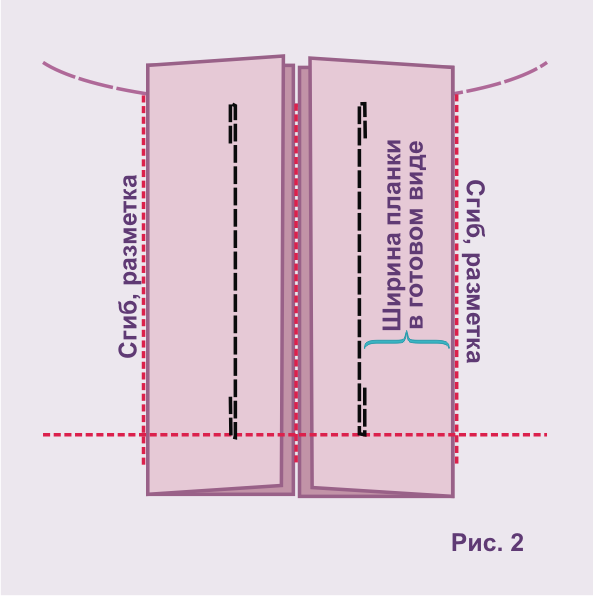 Sometimes the slots of the sleeves are processed with a set-in bar.
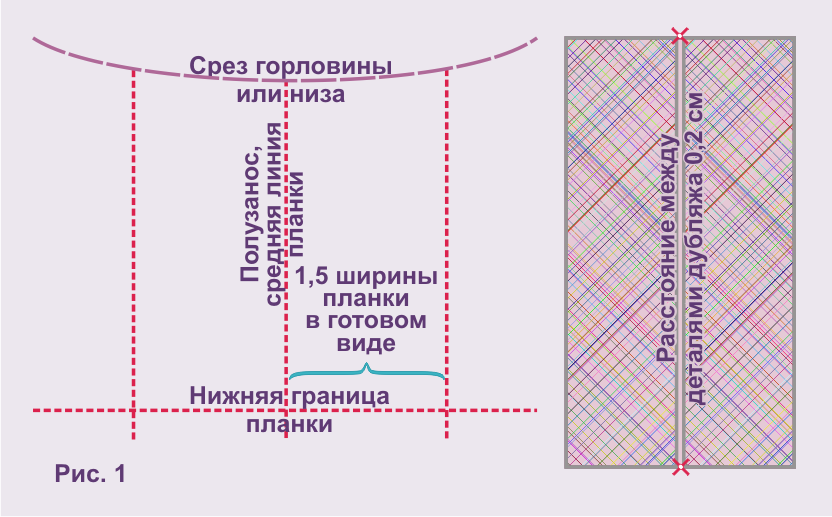
For processing, you will need 2 parts of the strap, a shelf and a doubler, suitable for the fabric from which the product is sewn.
We start with markup.
The bar is marked with three verticals and one horizontal (Fig. 1).
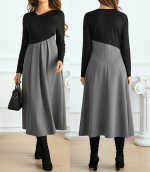
Ready-made patterns with one-piece selection, processing of selection in clothing models
 Using the example of my ready-made patterns, let's figure out what a one-piece selection is and how to properly process when sewing such products.
Processing principle one-piece selection the same for products of the dress assortment (dresses, blouses, bathrobes) and for outerwear.
Lesson content:
Lolita coat pattern $3.00 |

Pattern "coat with soft folds" $2.50 |
Up-to-date information about new patterns in Viber:
My Facebook page
![]()
-
Any pattern for free for a review of a previously made order
More...
Lifetime promotion for buyers of patterns!

Leave a review about my store of patterns for an order that you made before, and you will receive any paid pattern of your choice Free!
Catalog:
New patterns on the site


Most readable articles
- How to print patterns in full size on sheets of any format? Category: F.A.Q.
- Pattern of a dress for a babydoll girl Category: Dress patterns for free
- How to take measurements for sewing Category: Sewing: general questions
- How to sew a skirt without darts and without a pattern: "Tatyanka" Category: How to sew...?
- How to learn to sew from scratch at home for free? Category: F.A.Q.
- Skirt with a belt - how to sew a belt to a skirt and processing the belt when sewing a skirt for beginners Category: Waist section processing with and without belt
- How to choose a pattern size? Do Olkhovskaya patterns require a fit? Category: F.A.Q.
- Do-it-yourself parsley, Cossack and Gnome according to free patterns by Vera Olkhovskaya Category: How to sew a New Year's costume and costumes for the holidays with your own hands
New lessons and reviews
-
I sewed a boho trapeze dress size 42 according to your pattern
Category: Patterns - photos and reviews from users

-
I made two dresses with this pattern.
Category: Patterns - photos and reviews from users

-
Thanks for the fast order processing.
Category: Patterns - photos and reviews from users

-
When sewing, I slightly deepened the front neck
Category: Patterns - photos and reviews from users
