Processing of necks, armholes, sides
Video tutorials and articles for beginners to learn how to sew on the processing of necklines, armholes, sides in different types of clothing when sewing.
 Vera Olkhovskaya
This question, sooner or later, always arises before a novice couturier and immediately gives rise to many small questions.
Maybe it's a bad (inaccurate) pattern? Maybe the figure is non-standard? What is the best way to do this? Will I damage the product? Maybe better not? How to make armholes symmetrical? And so on…
But it is impossible to bypass the trimming of the armhole, and this operation is important not only when sewing, but also in altering clothes.
People often ask how to alter a blouse or dress if the shoulders are hanging? how to make a big one small? how to alter a coat that is tight under the arms?...
There is only one answer to all these questions: cut the armhole to fit.

 Vera Olkhovskaya
The fastener on the side of the kosovorotka, according to academician Likhachev, was created specifically so that the pectoral cross would not fall out during work.
They made the fastener more often on the left, less often on the right. If the fastener was processed with a strap, the top wasand embroidered right strap.
On the basis of the kosovorotka, tunics were sewn (see photo) during the time of Tsarist Russia and for the Bolshevik cavalry army.
In this article, it is proposed to process the fastener of the blouse with a set-in placket on the left side, the right placket on top.
Patterns kosovorotkas / embroidered shirts / gymnasts 42 - 52, 52 - 62
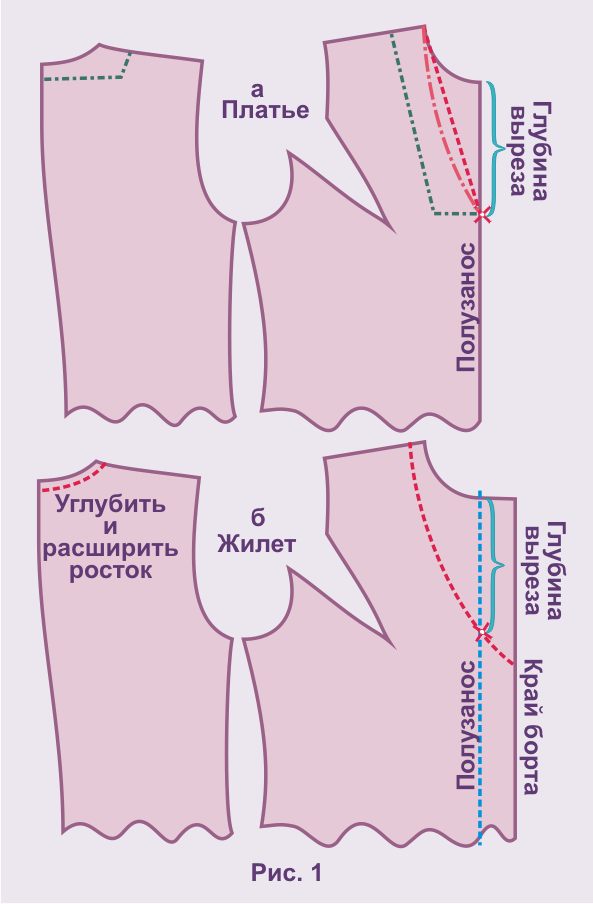
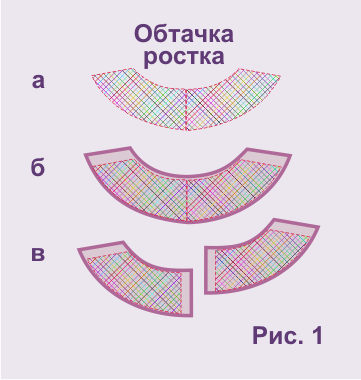
It should be noted that the processing of the neck of the kosovorotka (Fig. 1) takes place in two stages: the processing of the fastener and the stitching of the collar.

Patterns of women's fur vest elongated $1.20 |
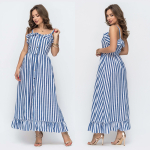
Pattern of a cut-off sundress with a flared skirt on the assembly $2.00 |
 This method of processing the neck is suitable for products with embroidery on the shelf and with an insert from an embroidered border (Fig. 1).
A complete description of cutting, sewing a men's shirt like "vyshyvanka",
and also see patterns from 42nd to 52nd and from 52nd to 62nd size.
So, if you are using a ready-made embroidered border, then sewing a shirt should begin by joining the border and the shelf into one whole.
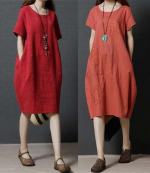
 Many home couturiers have difficulties with the processing of necklines, armholes and the bottom of knitwear.
The photo on the left shows a dress with a neckline, the bottom of the sleeves and the bottom of which are “hemmed” without the use of stitching, overlock and handmade.
The dress has withstood more than 10 machine washes and looks as good as right after sewing.
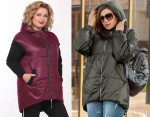
Simple patterns for a jacket-vest with a hood $2.00 |

Dress pattern "a-line with a detachable sleeve" $1.50 |

Vera Olkhovskaya
The clasp "drop" can be processed in two ways:
- edging
- turning
Vera Olkhovskaya
A drawing of any base (see. "Basics") involves a neckline, which in most cases is inconvenient and uninteresting.
You can change the style of the neck both on the fitting and on the pattern itself before trying on the product (video at the end of the article).
To do this, measure the desired neckline depth on the customer (see also "Removal of measurements").
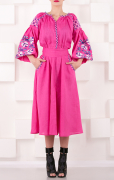
A simple pattern of an embroidered dress with a detachable sleeve $2.00 |
Boho patterns cutaway simple cocoon dress $2.00 |
Vera Olkhovskaya
Quite often, the facings of the armhole or neckline do not fit entirely on the fabric.
You have to cut them out of small patches, which is a considerable difficulty even for experienced tailors.
Let's try to simplify this task as much as possible.
 Another very simple way to process the neck with an oblique inlay (see. "How to make a bias tape").
This method differs from edging in a simpler approach and is applicable to fabrics of any thickness and texture.
Restriction - the shape of the neckline: cape with a clasp or a seam in the middle, "circle", "oval".

Vera Olkhovskaya
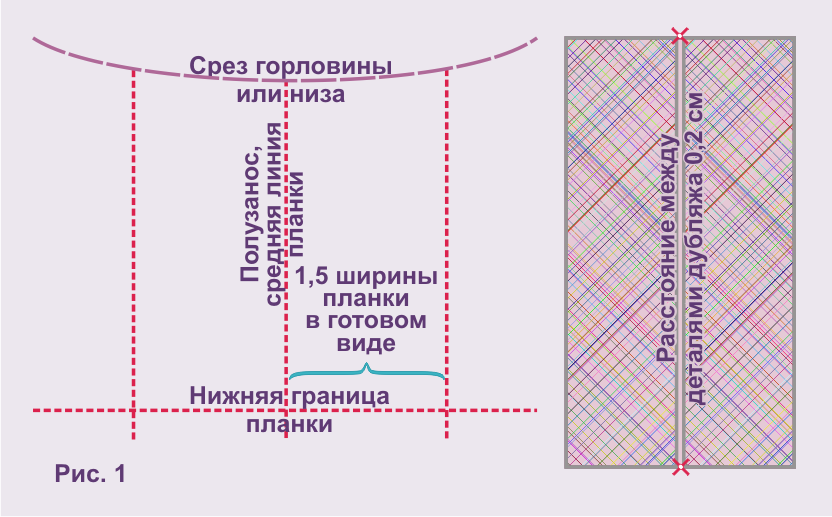
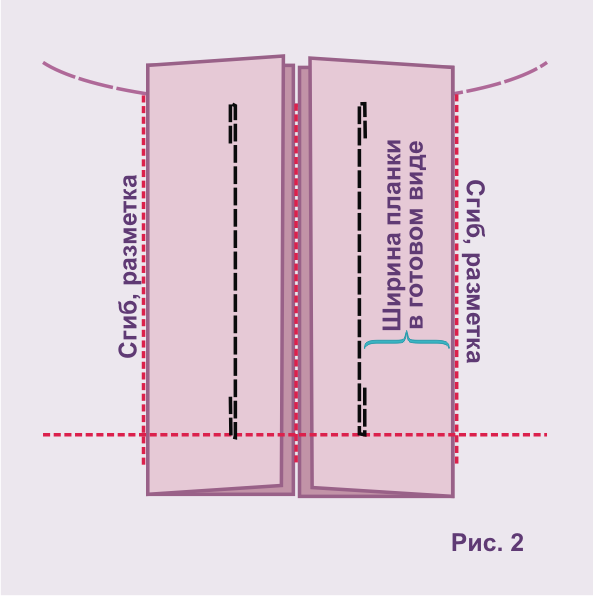
The set-in bar is one of the simplest and most common types of fasteners.
It can be used not only on T-shirts, blouses, windbreakers and dresses, but also in skirts instead of the traditional vent.
 Sometimes the slots of the sleeves are processed with a set-in bar.
For processing, you will need 2 parts of the strap, a shelf and a doubler, suitable for the fabric from which the product is sewn.
We start with markup.
The bar is marked with three verticals and one horizontal (Fig. 1).
Vera Olkhovskaya
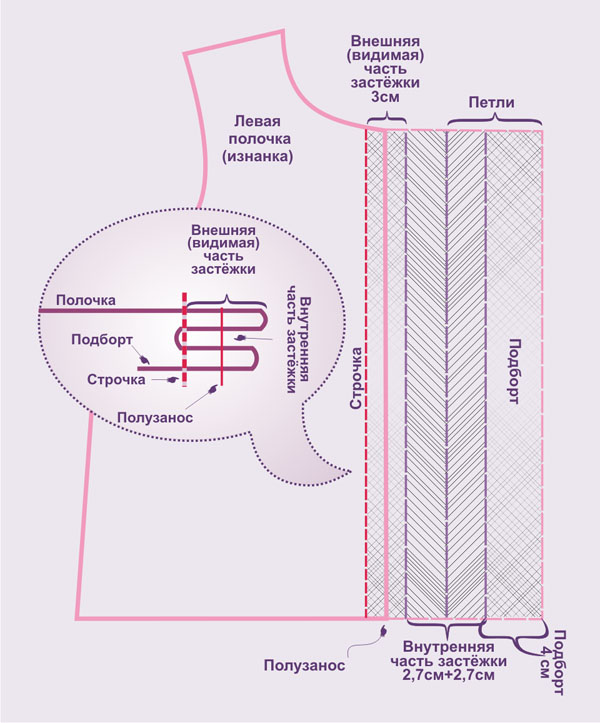
As a rule, not many product processing units can frighten novice home couturiers with the complexity of sewing.
Among the "horror stories" for beginners, the slip fastener in blouses. And all because of the name.
In fact, the buckle is nothing more than a “fold” that covers the buttons and loops, which, in turn, are located on another “fold”.
The supantaya clasp is quite easy to perform, as it is performed on a one-piece allowance for the right shelf.
The most difficult thing is to correctly iron all its folds (folds).
And it is precisely in ironing that the processing of the bead with a slip fastener lies.
Before ironing, of course, the lines along which the fabric is folded must be marked.
So, you should start from the moment of cutting ...

Up-to-date information about new patterns in Viber:
My Facebook page
![]()
-
Any pattern for free for a review of a previously made order
More...
Lifetime promotion for buyers of patterns!

Leave a review about my store of patterns for an order that you made before, and you will receive any paid pattern of your choice Free!
Catalog:
New patterns on the site


Most readable articles
- How to print patterns in full size on sheets of any format? Category: F.A.Q.
- Pattern of a dress for a babydoll girl Category: Dress patterns for free
- How to take measurements for sewing Category: Sewing: general questions
- How to sew a skirt without darts and without a pattern: "Tatyanka" Category: How to sew...?
- How to learn to sew from scratch at home for free? Category: F.A.Q.
- Skirt with a belt - how to sew a belt to a skirt and processing the belt when sewing a skirt for beginners Category: Waist section processing with and without belt
- How to choose a pattern size? Do Olkhovskaya patterns require a fit? Category: F.A.Q.
- Do-it-yourself parsley, Cossack and Gnome according to free patterns by Vera Olkhovskaya Category: How to sew a New Year's costume and costumes for the holidays with your own hands
New lessons and reviews
-
I sewed a boho trapeze dress size 42 according to your pattern
Category: Patterns - photos and reviews from users

-
I made two dresses with this pattern.
Category: Patterns - photos and reviews from users

-
Thanks for the fast order processing.
Category: Patterns - photos and reviews from users

-
When sewing, I slightly deepened the front neck
Category: Patterns - photos and reviews from users
