Size charts What is the height of the pattern Payment methods Ask a question Reviews
PDF pattern for printing on a printer or plotter in full size on the sizes of a coat - a jacket from 42 to 52. Printed on sheets of paper from A4 to A0. Cutting through the projector is possible.
 Free download instructions on how to sew to the pattern of this coat...
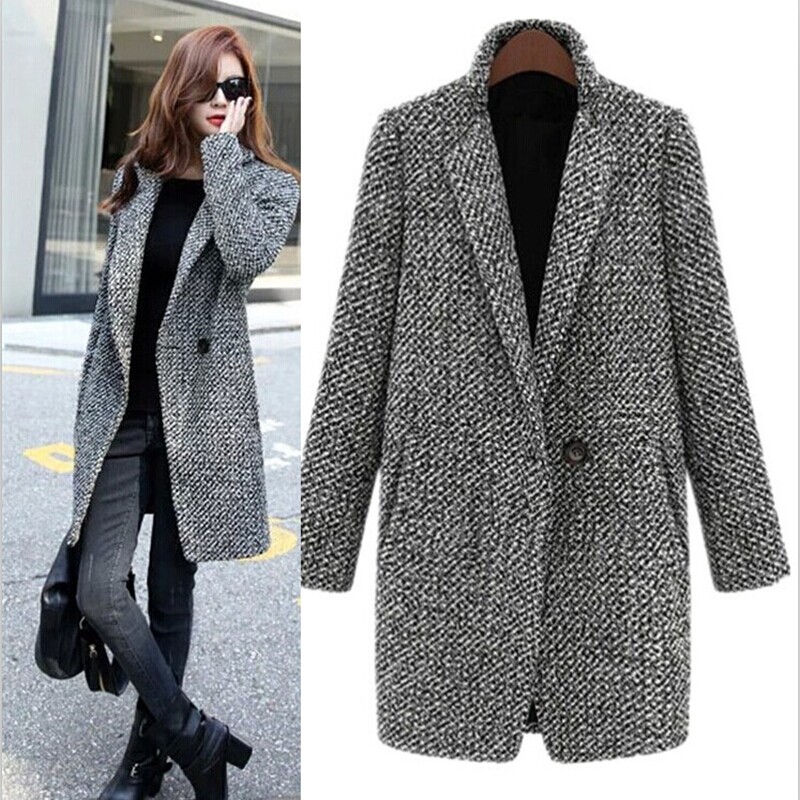
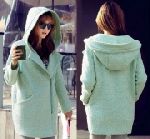
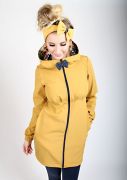
Examples of sewn jacket coats for this pattern on 50 size from buyers Yulia Chumachenko and Alena Yurevich, look at the photo.


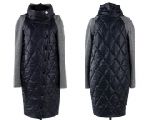
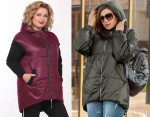
 For a large size pattern from 52 to 64 for a jacket coat, see this link...
Instructions on how to sew a coat jacket to a pattern
Table of Contents:
- A set of patterns, consumption and choice of fabric for sewing a coat.
- How to download a pattern and print it.
- How to cut and sew a coat jacket for women:
Description of the pattern, style, choice and consumption of fabric for a coat
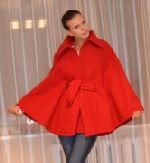
 Electronic pattern "coat-jacket" 40-52.
Sizes: 40-52 (buyer gets ALL sizes!).
File format for download in order:
PDF in full size and without seam allowances.
After paying for the order, you will receive links to download two files patterns of a coat of a women's jacket gradation of sizes from 40 to 52:
- PDF file A4, adapted for printing patterns on sheets of A4 paper in any program on any device, including mobile phones.
- Multi-format PDF file for printing on sheets of any size from A0 to A4 on a printer or plotter using Adobe Reader.
Sewing difficulty level: professional - the pattern is not suitable for beginners, as professional skills in cutting and sewing outerwear are required.
 This style of coat is suitable for all types of figures.
The consumption of the “top” fabric is, depending on the size, 210 - 220 with a width of 140 cm. The consumption of the lining, excluding the consumption of burlap pockets, is 150 cm. And the doubler will need about 130 cm.
Of the equipment, except for an iron or a steam generator, you will need a mannequin.
Almost all coat fabrics are suitable for sewing. For the black and white version, you can use tweed, two-tone boucle or houndstooth.
См. также what to make a coat
The set of patterns for a coat-jacket includes (Fig. 1): patterns for the back, shelves, selection, English-type collar, a classic two-seam sleeve (upper and lower half) and shelf lining. The back lining is cut out according to the pattern of the back.
How to download a coat pattern and print
 How to buy an electronic pattern
How to print a pattern life-size at home on A4 sheets
How to choose a pattern size without taking measurements and using tables
Download free patterns of dresses and coats for children
How to cut and sew a do-it-yourself coat jacket for women
 Attention! Sewing a jacket coat has a lot of nuances and requires well-developed skills, so it is not suitable for learning to cut and sew.
About allowances when sewing a coat
Seam allowances and thread direction (Fig. 2).
Shoulder, side seams, as well as front and elbow sections of the sleeve - add 1 - 1,2 cm each.
No seam allowances are added along the sprout, armhole and sleeve hem, so as not to distort or shorten the curve.
The edge cut of the shelf and the neck will require a processing allowance of 0,7 - 1 cm. Usually, no allowance is added along the neck, but since the length of the flare may vary, it is better to cut off the excess after processing the edge.
 On the bottom we add, as usual, 3,5 - 4 cm.
Separately, you should talk about the allowance for the middle seam of the back. For processing, the same 1 - 1,2 cm is enough, but do not forget the allowance for slots - 5 - 6 cm.
Of course, the slot can be located not only in the middle seam of the back, but also in the side seams. In this case, the allowances are the same.
Sleeve slots, if any, will require 3,5 - 4 cm at the bottom of the elbow seam. The length of the sleeve slots in finished form is within 6 - 10 cm. And along the bottom of the sleeve we add 3 - 3,5 cm.
How to cut a pick in a coat
It is recommended to cut out the hem and collars (top and bottom) after the first fitting, but marking should be done at the time of cutting the front, back and sleeves. Many masters of indoshiv who carry out three traditional fittings and cut out sleeves not at once, but only to the second fitting.
So, back to selection. In my opinion, it is better to cut out the selection according to the product. This is much more accurate, as it allows you to take into account the changes made during the fitting and accurately add the allowance needed to form the edging.
 If cutting is made according to the selection pattern, then the allowances for the turning cut will be 1 - 1,5 cm, that is, more by 0,2 - 0,5 cm (depending on the thickness of the fabric).
2,5 cm is enough along the bottom of the selection, and 1 - 1,2 cm along the cut of the connection with the lining of the shelf.
Lower and upper collars in a coat
I’ll make a reservation right away that classic English collars are not suitable for women’s clothing, which require special processing, according to the canons of which the lower collar is cut out without allowances along the flying edge and ends. In this case, an English type collar is considered, and therefore you will need an allowance of 0,7 - 1 cm along the flying edge and the ends of the collar, and 1 cm along the stitching cut.
 For the upper collar, the allowance for the turning cut increases to 1 - 1,5 cm, depending on the thickness of the fabric, and for the stitching cut - 1 - 1,5 cm.
Please note that the lower collar consists of two halves. This is due to the shared direction along the raskep line. On the middle seam of the lower collar, the seam allowance is 1 cm.
The upper collar is one-piece and the share thread runs parallel to the middle line of the collar.
It is also worth dwelling on the size of the collar. The size of the collar is not indicated, since it should be cut out based on the length of the neck, which will be known only after processing the lapel. In other words, the length (size) of the collar should be determined on the second fitting, when the shoulder seams and lapels are fully processed. At the first fitting, it is enough to attach a collar pattern to determine the place where the flare begins (where the lapel ends and the collar begins).
For the back, the share goes along the midline or perpendicular to the waist line, for the shelf - parallel to the half-skid. For selection, the share is parallel to the edge of the lapel. And for the upper half of the sleeve, it passes through the extreme points of the upper half.
For the lower half, the share may not be determined so strictly, a deviation of a couple of degrees is allowed, and additional stitching is also possible to save fabric. But we'll talk about them later.
dubbing
 As in other top products, the back of the coat-jacket is partially duplicated. The bottom of the dubbing is cut with large teeth so that the edge of the dublerin is not visible from the front side. Doublerin for the back is cut out without seam allowances.
The shelf is completely duplicated. Dubbing is also cut out without seam allowances. It is extremely important to mark the lapel fold line on the details of the dubbing of the shelf and cut the dubbing along this line. The lapel detail is glued indented from the shelf detail by 0,3 - 0,5 cm. In addition, the kink area can be strengthened with a shared dubbing strip or any special adhesive "edge".
The hem allowances and the allowance for the back slot are also duplicated. From the dubbing of the shelf, the indent is 0,3 - 0,5 cm.
The selection and the upper collar are completely duplicated. We cut out doublerin for the lower collar without seam allowances.
 And do not forget to duplicate the bottom of the sleeve.
See video master class how to stick dublerin on a coat
The layout of small sizes is shown in fig. 4, medium sizes - in fig. 5.
Stitches, pockets and coat lining
To save fabric, additional stitches are allowed on the lower half of the sleeve, on the collar in the lower part and on the lower collar.
Let's consider an additional stitch on the lower half of the sleeve (Fig. 6). It is better to cut the pattern above the level of the elbow. In addition to the usual allowances, we also add allowances for the seam of the finishing touch.
The marking of pockets in individual tailoring is made on fitting. Well, if the pocket falls on the tuck - it will securely keep the pocket from sagging.
The length of the pocket entry line is usually 14,5 - 15,5 cm. The horizontal pocket is located 5 - 7 cm below the waist and goes 1 - 2 cm into the tuck (Fig. 6). Inclined and vertical pocket - 3 - 5 cm below the waist. He may not fall into the tuck.
It is better to mark the pocket on the first fitting.
See more how to mark a pocket frame
And finally, consider cutting the lining (Fig. 7).
The allowances are the same except for the bottom. Since in women's coats the lining is made to fly away, you will need a double wide hem. Therefore, feel free to add 5 - 7 cm along the bottom.
You will also need an allowance for the slot, but you can make another slot in the middle seam in the area of the shoulder blades to provide additional freedom for the lining.
To save the lining, the sleeve is cut out with one elbow seam and in the transverse direction. Burlap pockets - rectangles.
See on the site how to sew other styles of women's coat models with ready-made patterns:
Download this pattern pdf:
Pattern "coat-jacket"
$3.00 (120 hryvnia)
Bank cards of the Russian Federation are not accepted for payment!
Size charts What is the height of the pattern Payment methods Ask a question Reviews
Vera Olkhovskaya in social networks:

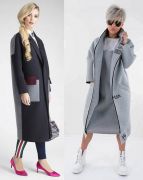
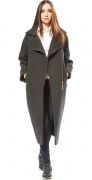
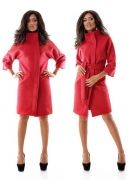
More patterns of models of a similar style or cut


-
Any pattern for free for a review of a previously made order
More...
Lifetime promotion for buyers of patterns!

Leave a review about my store of patterns for an order that you made before, and you will receive any paid pattern of your choice Free!
Catalog:
New patterns on the site


Most readable articles
- How to print patterns in full size on sheets of any format? Category: F.A.Q.
- Pattern of a dress for a babydoll girl Category: Dress patterns for free
- How to take measurements for sewing Category: Sewing: general questions
- How to sew a skirt without darts and without a pattern: "Tatyanka" Category: How to sew...?
- How to learn to sew from scratch at home for free? Category: F.A.Q.
- Skirt with a belt - how to sew a belt to a skirt and processing the belt when sewing a skirt for beginners Category: Waist section processing with and without belt
- How to choose a pattern size? Do Olkhovskaya patterns require a fit? Category: F.A.Q.
- Do-it-yourself parsley, Cossack and Gnome according to free patterns by Vera Olkhovskaya Category: How to sew a New Year's costume and costumes for the holidays with your own hands
New lessons and reviews
-
I sewed a boho trapeze dress size 42 according to your pattern
Category: Patterns - photos and reviews from users

-
I made two dresses with this pattern.
Category: Patterns - photos and reviews from users

-
Thanks for the fast order processing.
Category: Patterns - photos and reviews from users

-
When sewing, I slightly deepened the front neck
Category: Patterns - photos and reviews from users
