Size charts What is the height of the pattern Payment methods Ask a question Reviews
Electronic pattern of women's coats for sizes from 42 to 52. The entire range of sizes in one file. The pattern file is printed on a home printer or large format plotter.
 Printing can be done on sheets of paper from A4 to A0. Paperless cutting through the projector is possible.
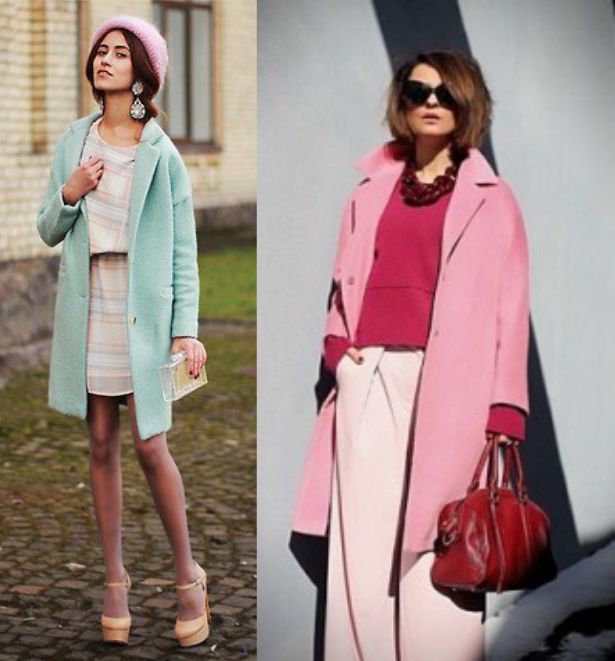
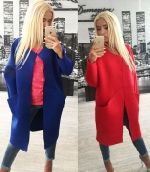
In the photo I sewed a coat according to this pattern.
 Free download instructions on how to sew a coat for this pattern...
How to sew a women's coat with your own hands according to the finished pattern "box"

Sizes: 42 - 52 (buyer gets ALL sizes!).
1. File format for download in order:
PDF in full size and without seam allowances.
After paying for the order, you will receive links to download two files coat patterns gradation sizes from 42 to 52:
- PDF file A4, adapted for printing patterns on sheets of A4 paper in any program on any device, including mobile phones.
- Multi-format PDF file for printing on sheets of any size from A0 to A4 on a printer or plotter using Adobe Reader.
Tailoring difficulty level: professional.
 The design of this coat model is somewhat unusual: the sleeve is one-piece with a gusset, going to the side seam. Collar on the type of English. This pattern is only for those who know how to sew, as sewing a coat requires professional skills, both in cutting and sewing the product. In the process, you will need a mannequin. Homemade mannequins will not work.
2. From what to sew a coat according to the pattern and fabric consumption
Any coat fabrics and jacquard are suitable for tailoring.
Consumption 240 - 260 cm while maintaining the length of the pattern. The consumption of the lining is about 150 cm, if the pattern is unmodeled, or about 240 cm, if modeling is not used. In addition, you will need about 120 cm of dublerin. In addition to the “top” fabric and lining, you will need an “epaulette” type shoulder pad made of batting or synthetic winterizer.
The set of patterns includes patterns for the back, shelves, gussets and collar of the English type. (picture 1). Du (distance from waist to bottom) in  patterns is 65 cm.
Patterns are given WITHOUT seam allowances.
How to choose a size without using tables and taking measurements ...
How to buy an electronic pattern...
How to print a pattern at home in full size on A4 sheets or on sheets of any other format.
Buy and download this dress pattern
3. How to cut a coat according to a finished electronic pattern
 When making patterns, pay attention to notches (picture 2): the level of the waist of the backrest and the shelf is indicated only on the middle seam of the backrest and on the vertical edge of the edge of the shelf. On the side seams - notch corresponds to the sharp corner of the gusset.
The distance from the edge of the side to the vertical of the half-skid for all sizes is 4 cm. And between the middle line of the back and the middle seam of the back - 3 cm.
Attention! The center seam is required for this piece and does NOT line up with the center line!
Selection - combined. It is better to make a “pattern” of selection immediately from dubbing (picture 3) according to the pattern of the shelf, adding 2 - 3 mm along the lapel.
 We also cut out the lower and upper collars from dublerin, while we cut out the upper collar along the lower one, adding, as well as to the selection, 2 - 3 mm. This little trick will give you the fit you need when turning the lapel and collar.
The fabric is folded in half, the edges are aligned but the fold is across the fabric, since the shelf with a one-piece long sleeve and a one-piece selection fragment does not pass if the fabric is folded in the usual way with a fold along.
As you know, the layout must take into account the direction of the shared thread (picture 4). Pay attention to the location of the backrest: indentation from the edge along the bottom  is 3,5 cm, while the sprout is 0,5 cm. If you increase the indentation by another couple of centimeters, then a slot can be made from the resulting allowance.
The share of the shelves is parallel to the edge of the side and, accordingly, to the semi-skid.
The lower collar is parallel to the rake line, the upper collar is to the middle line and therefore the part fits to the fold of the fabric.
At the selection, the share is parallel to the edge of the lapel or the edge of the side. In this case, this is not important (the shape of the lapel does not oblige), but if the fabric is piled or at least “with a hint of a pile”, then the direction of the share in both parts of the selection should be the same. And the gusset is shared along the part.
 Seam allowances. Shoulder sleeves, side sleeves, gusset cuts, side cut (on the front and hem), flare, departure, end and cut of the collar stitching, as well as the middle seam for the lower collar - have a seam allowance of 1 - 1,2 cm. add 3,5 - 4 cm to the bottom of the product, 2,5 - 3 cm to the bottom of the sleeve. Cut out the sprout and neck for the stroke line.
Dubbing for the shelf and back is cut out according to patterns. In this case, only a small part of the back is duplicated - up to the level of the shoulder blades. It is important that dubbing covers the shoulder. The edge of dubbing is cut with large teeth. We glue the shelf completely to allowances, excluding only the tuck and sleeve.
And the most important point: along the inflection lines of the lapel and the edge of the bead, it is cut into dubbing and its parts are glued at a distance of 0,5 cm. The gap at the fold of the lapel serves the same purpose and greatly facilitates the process of further processing of the product.
 The undercut of the lining is carried out according to the patterns of the shelf and back (figures 5 и 6). The back-sleeve and gusset lining details are cut out with the same allowances as the “top” detail of the same name. Exceptions - the bottom of the product - add 10 cm (for a wide hem with a closed cut and a base) and the middle seam of the back (4 cm for processing the "pocket" in the area of the shoulder blades). The detail of the lining of the shelf-sleeve is cut out along the shelf "with a deduction" of the area of the selection. In other words, we cut off the shelves from the pattern, close the tuck (picture 5) and add a double allowance for the cut of the connection with the selection. Another detail is burlap for the lining pocket.
The lined pocket is usually located on the right side, since the right shelf in a ladies' coat overlaps the left. The pocket can be laid on or located in the seam of the connection of the selection and lining. For a patch pocket, a rectangle from 15 to 20 is suitable (this is already with processing allowances), for a pocket in the seam, the height of the burlap will be 25 cm, and the width will be 15 (with processing allowances).
4. How to sew a coat
Step-by-step sequence of sewing a coat with your own hands at home
- We prepare the fitting: we paste the dubbing and process the tucks on the back and shelf (see "Dart Processing" ). We notice the one-piece part of the selection with large (up to 12 cm) oblique stitches. WTO (we sew the top of the tuck, we sew the elbow area, we pull the shoulder, we iron the board, while placing it towards us and parallel to the edge of the ironing table) and dry it on a mannequin.
- We sweep the product for fitting and lightly iron the seams. We make the lower collar, the WTO (we pull it along the “stand” and iron the ends), dry it on a mannequin, pin it off with pins.
- We make a shoulder pad of the “epaulette” type and attach it to the product. You can also use ready-made shoulder pads made of foam rubber.
- Fitting. We check the balance of the product, if necessary, adjust the shoulder seam and the sprout. You can also change the shape of the lapel. We pin the lower collar, if necessary, change the shape. We mark the pockets. Specify the length of the product and the sleeve.
- We remove the mark and make changes made during the fitting. We establish the product (we make paired parts strictly congruent). We process the sides and pockets (see videos and articles about pocket processing ). WTO shelves, dry on a mannequin.
- We process (grind) the collar, WTO, dry it on a mannequin.
- We grind the shoulder, side seams (with overcasting from the waist to the bottom) and the middle seam, if there is a slot or a warehouse, we process it too. We sew a gusset. We iron the seams, duplicate the allowance along the bottom of the product and along the bottom of the sleeve. We wrap the bottom of the product. Dry on a mannequin with shoulder pads.
- We process the lining, leaving the shoulder seams unstitched for 7-10 cm at the neck. Leave the bottom unfinished. Do not forget about the loop on which we will hang the coat. I would also like to dwell on the processing of the middle seam. So that the lining on the coat does not tighten, an allowance is made along the middle seam when cutting and processed with a “pocket” (picture 6).
- We process the bottom of the product (we sweep, iron, hem), leaving only the selection unlined. Please note: the selection is also folded, swept up and ironed, but not hemmed. We fold the bottom of the sleeves, laying a line in the middle of the folded allowance and iron it.
- We connect the lining and the collar, we grind the "remainder" of the shoulder seams.
- We sew a collar. We first tuck the lower collar into the sprout-neck of the “top”, and we tuck the upper collar into the sprout-neck of the lining-lining. We check the correctness of the stitching on the mannequin and stitch the collar. We check the correct stitching of the collar (congruence, strength, the ends of the collar do not bend away from the mannequin, the lapels do not bulge, etc.). We make notches on the stitching seam allowance, where necessary, lay them out, as for ironing, and we note them in this position. Then we sweep the upper and lower collars together exactly along the stitching seam. Particular attention to basting in the area of the rake. We check the correctness on the mannequin. The WTO of the collar and lapel is performed using the “big pillow” (see tailor's ironing pads ) and the correctness of its implementation is again checked on the dummy. When the product is dry, remove the basting from the stitching seam allowance of the collar turned down. Machine- or hand-fasten the “released” top and bottom collar allowances as close as possible to the sew-in seam.
- We put the coat on the mannequin, not forgetting the shoulder pads, and we set up the lining. That is, we align it with respect to the processed bottom of the product and the bottom of the sleeves, leaving the desired allowance for processing.
- We process the bottom of the lining, as already mentioned, into a hem with a closed cut (see "Processing the bottom of the product" ). We finish processing the bottom of the product in the area of \u40b\u50bthe bands, iron it. We overcast the cut of the connection of the pick and lining 5 - 1 cm from the bottom and we sew the pick to the “top” of the product with straight stitches up to 30 cm long, stepping back from the edge of the pick, 40 cm. Sew the pick to the shelf with large hidden stitches NOT TIGHTENING. We perform the hemming from above and do not reach the bottom by 1 - 1,5 cm. We attach the bottom of the selection to the “top” of the product with a thread leg XNUMX - XNUMX cm long.
- Sew on the shoulder pads. Loops, buttons. Remove temporary stitches. Finishing ironing. Drying on a mannequin. Ready!
Watch the video sewing master class on how to sew loops on a coat and jacket.
Download this pattern pdf:
Pattern coat "box"
$3.00 (120 hryvnia)
Bank cards of the Russian Federation are not accepted for payment!
Size charts What is the height of the pattern Payment methods Ask a question Reviews
Vera Olkhovskaya in social networks:


-
Any pattern for free for a review of a previously made order
More...
Lifetime promotion for buyers of patterns!

Leave a review about my store of patterns for an order that you made before, and you will receive any paid pattern of your choice Free!
Catalog:
New patterns on the site


Most readable articles
- How to print patterns in full size on sheets of any format? Category: F.A.Q.
- Pattern of a dress for a babydoll girl Category: Dress patterns for free
- How to take measurements for sewing Category: Sewing: general questions
- How to sew a skirt without darts and without a pattern: "Tatyanka" Category: How to sew...?
- How to learn to sew from scratch at home for free? Category: F.A.Q.
- Skirt with a belt - how to sew a belt to a skirt and processing the belt when sewing a skirt for beginners Category: Waist section processing with and without belt
- How to choose a pattern size? Do Olkhovskaya patterns require a fit? Category: F.A.Q.
- Do-it-yourself parsley, Cossack and Gnome according to free patterns by Vera Olkhovskaya Category: How to sew a New Year's costume and costumes for the holidays with your own hands
New lessons and reviews
-
I sewed a boho trapeze dress size 42 according to your pattern
Category: Patterns - photos and reviews from users

-
I made two dresses with this pattern.
Category: Patterns - photos and reviews from users

-
Thanks for the fast order processing.
Category: Patterns - photos and reviews from users

-
When sewing, I slightly deepened the front neck
Category: Patterns - photos and reviews from users
