Size charts What is the height of the pattern Payment methods Ask a question Reviews
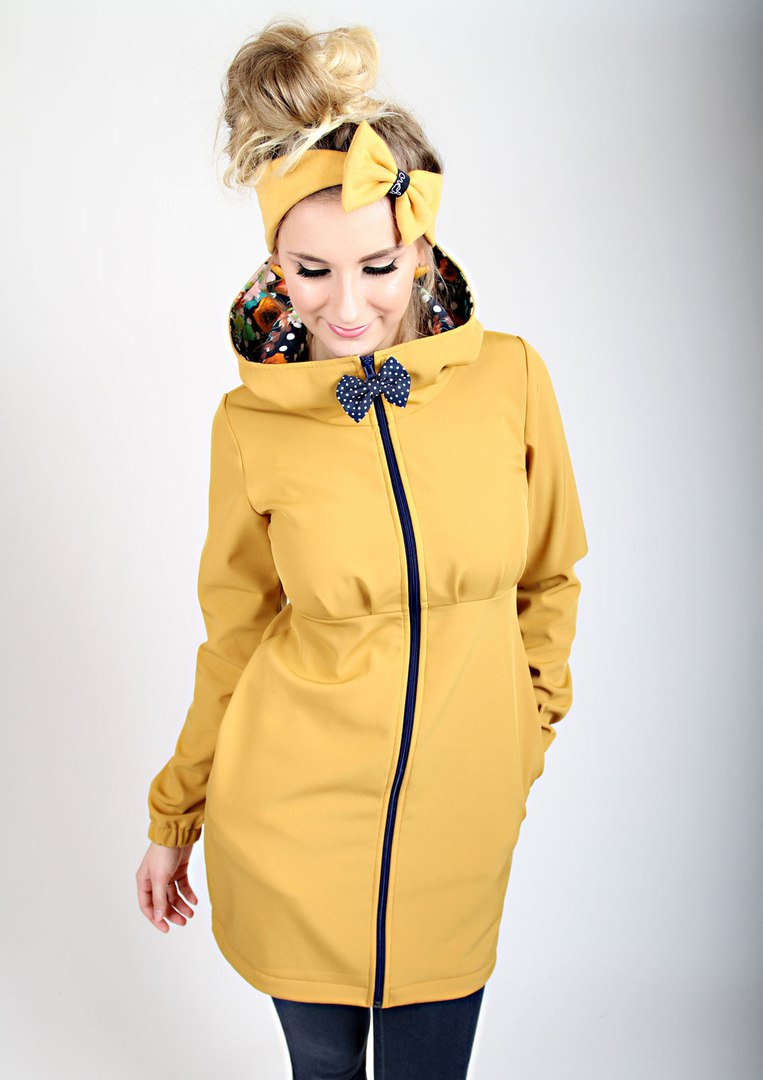
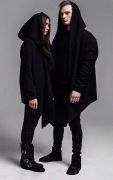
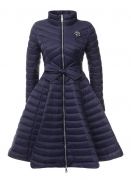
Electronic pattern of a women's jacket with a zipper and a hood for life-size printing on a home printer or large-format plotter. Can be printed on standard sheets of paper of any size from A4 to A0.
 Free download instructions on how to sew a jacket pattern...
Description of the pattern and style, consumption and choice of fabric for sewing jackets
Description:

All sizes from 42 to 52 or from 52 to 64 are purchased in one PDF file of a jacket pattern.
File format for download in order:
PDF in full size and without seam allowances.
After paying for the order, you will receive links to download two files jacket patterns for each size gradation you choose:
- PDF file A4, adapted for printing patterns on sheets of A4 paper in any program on any device, including mobile phones.
- Multi-format PDF file for printing on sheets of any size from A0 to A4 on a printer or plotter using Adobe Reader.
Sewing difficulty level: medium - the product only seems simple and will require cutting and sewing skills.
 Jacket pattern set (picture 1)

- Back
- Shelf - yoke and lower part
- Two-seam sleeve - upper and lower halves
- Anorak hood - side and middle details
- Burlap pocket - valance and facing
- Pickup
- Shelf lining
The jacket can be sewn both with a hood and without a hood - with a collar made of "dovyaz" (cuffs). There are two variants of the neck marked on the patterns.
The model is complemented by a pocket in the side seam, which can be processed in two ways, which will be discussed below. The location of the pocket on the patterns is marked.
Patterns for lining the back, sleeves and hood are not included in the kit, as they are cut out according to the patterns of the same name of the “top”.
Style and fabric consumption
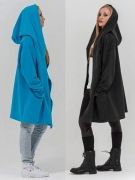
 This style of coat is suitable for all types of figures of any height. The silhouette is free.
The consumption of fabric for sewing this jacket model with a width of 140 - 150 cm will be from 190 to 260 cm, depending on the size. The consumption calculation is made taking into account that the inner part of the hood will be cut out of the lining fabric. An accurate calculation should be performed with ready-made patterns after specifying the length of the sleeve and the length of the product.
Lining fabric consumption: from 150 to 200 cm, with a width of at least 140 cm.
Length of the zipper tape: from 85 to 98 cm. The easiest way is to adjust the length of the product to the zipper available.
From what to sew a detachable jacket with a zipper with a hood
 Any raincoat fabric will do and the choice of it depends more on your preferences. In addition to raincoat fabrics, you can sew a jacket from denim or thin coat fabric. For example, from loden.
The lining fabric should also be chosen to taste. It can be a regular lining fabric. But, if you prefer a slippery lining, it is better to choose satin fabrics, and if you need a warm lining, then you can use a woolen bike or faux fur on a soft knit basis. Fleece will work too. In combination with a membrane fabric, fleece will give a fairly warm jacket without additional insulation. Even a fleece footer can be used as a lining if it is soft enough.
All of the above fabrics for lining can be used without insulation.
Instructions for buying and self-printing
How to print a full-size pattern on A4 - A0 sheets
How to choose a pattern size without taking measurements and using tables
Full-size ready-made patterns free download
Sewing a detachable jacket with a zipper with a hood at home
 First, let's deal with the choice of size. The thicker the lining, the larger size you need to choose. If you are sewing a jacket with faux fur, choose a size larger than for a silk-lined jacket. You should be guided by the volume of a similar product, comparing it with the size of the patterns.
It is also desirable to compare the length of the jacket and the length of the sleeve with the length of the finished product and shorten or lengthen it before cutting.
Seam allowances
Add a 1 cm allowance to most cuts.
The exception, as always, is the cuts of the sprout (the neck of the back) and the neck, as well as the sleeves. We do NOT add allowances to them. We also do not add to the “front” cut of the hood, also, so as not to shorten it with an allowance.
We add 3-5 cm along the bottom of the sleeve and the bottom of the jacket, depending on the presence or absence of a drawstring. For the drawstring, we take a larger allowance, since the drawstring should also assume a small overlap.
As for the details of the burlap, it is recommended to put your palm on it and determine whether you need an allowance, given that it will take 1 cm to process around the perimeter of the pocket. We do not add an allowance along the cut of the entrance to the pocket (if the hands are large) or add no more than 0,5 cm (for small hands).
To cut the lining, we use the same allowances, except for the bottom - we take 5-6 cm along the bottom of the product and the sleeve, since it is very important that the lining does not tighten; it is important that the lining does not tighten. Even along the midline of the back, we add an allowance-warehouse of 2,5 - 3 cm, for processing slots in the area of the shoulder blades.
How to cut a jacket: layout
One of the most important moments of cutting and sewing a product is the layout of finished patterns on fabric, taking into account the shared direction.
The fabric is folded in half face to face, the edges are aligned and parallel to the edge of the cutting table (picture 2).
If the lobar thread of the back runs parallel to the middle line of the back and the back fits into the fold, then everything is also obvious with the upper half of the sleeve - the lobar thread is parallel to the protruding points of the front seam of the upper half. In this case, it is convenient to put this part to the fold. The requirements for the share of the lower half of the sleeve are not so strict, but it is also convenient to lay it to the hem with the front seam.
The share for details of the shelf is traditionally parallel to the semi-skid (the middle line of the shelf), for the middle part of the hood it is also parallel to the middle line. For selection, the share should coincide with the line of the edge of the board. For the side of the hood - along the part arbitrarily. We put the burlap in free places.
Please note that we need one middle part of the hood. One detail, while all the other details are paired.
The layout of the patterns on the lining fabric also deserves attention (picture 3). To save lining fabric, the sleeve can be cut across and, if the fabric is thin, then the upper and lower halves can be combined into one piece.
How to sew a jacket with your own hands
Sewing a jacket essentially comes down to three steps:
- Assembling the "top" of the jacket
- Assembling the lining of the jacket
- Connecting top and lining
Download this pattern pdf:
Pattern of a cut-off jacket with a zipper with a hood
$3.00 (120 hryvnia)
Bank cards of the Russian Federation are not accepted for payment!
Size charts What is the height of the pattern Payment methods Ask a question Reviews
Vera Olkhovskaya in social networks:

More patterns of models of a similar style or cut

Pattern of a sweatshirt with a hood for women or men $2.50 |

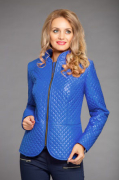
Women's leather jacket $2.50 |
Beginner Hooded Coat Pattern $2.70 |
Pattern of a hoodie jacket with pockets $2.00 |


-
Any pattern for free for a review of a previously made order
More...
Lifetime promotion for buyers of patterns!

Leave a review about my store of patterns for an order that you made before, and you will receive any paid pattern of your choice Free!
Catalog:
New patterns on the site


Most readable articles
- How to print patterns in full size on sheets of any format? Category: F.A.Q.
- Pattern of a dress for a babydoll girl Category: Dress patterns for free
- How to take measurements for sewing Category: Sewing: general questions
- How to sew a skirt without darts and without a pattern: "Tatyanka" Category: How to sew...?
- How to learn to sew from scratch at home for free? Category: F.A.Q.
- Skirt with a belt - how to sew a belt to a skirt and processing the belt when sewing a skirt for beginners Category: Waist section processing with and without belt
- How to choose a pattern size? Do Olkhovskaya patterns require a fit? Category: F.A.Q.
- Do-it-yourself parsley, Cossack and Gnome according to free patterns by Vera Olkhovskaya Category: How to sew a New Year's costume and costumes for the holidays with your own hands
New lessons and reviews
-
I sewed a boho trapeze dress size 42 according to your pattern
Category: Patterns - photos and reviews from users

-
I made two dresses with this pattern.
Category: Patterns - photos and reviews from users

-
Thanks for the fast order processing.
Category: Patterns - photos and reviews from users

-
When sewing, I slightly deepened the front neck
Category: Patterns - photos and reviews from users
