Vera Olkhovskaya
This pocket can be used for all products with a yoke on the shelf.
Pocket processing is considered on the example of a boy's shirt (see free pattern of this model).
The procedure for cutting and sewing such pockets
When trimming parts, pay attention to the fact that the burlap is trimmed along the already finished valve.
 Attention! Not according to a pattern, not according to a piece cut out of fabric, but according to a completely finished valve.
The shape of the burlap is a rectangle, the width of which is 4 cm greater than the width of the finished valve, and two corners are rounded (Fig. 1).
So, first make a valve.
Then, mark the pockets on the shelf according to the width of the burlap.
Lay on the front of the shelf (or shelves) of the burlap of both pockets and stitch it with a line at a distance of 1,5 - 2 cm from the top edge of the shelf (Fig. 2).
Please note that the line rises to the horizontal cut and does not reach the vertical cut of the burlap by 2 cm.
And the distance between the beginning and end of the line should be 0,2 - 0,5 cm less than the width of the valve, so that the entrance to the pocket is completely covered by it (see photo of the pocket).
When the lines are laid, the excess is cut out above them, notches are made in the corners and the entrance to the pockets is turned inside out.
The burlap is folded inside out, the seams are straightened out, sewn with oblique stitches about 1 cm long, and at the end a finishing line is laid.
The entrances to the pocket are ironed. Then the second ones (burlaps) are superimposed on these already stitched burlaps, they are ground down and overcast.
Ready-made valves are superimposed on the pockets, basted and adjusted.
The shelf and back are connected to the yoke.
Patterns of men's clothing


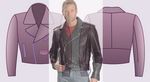

Jacket patterns
|
||||||||||||