Size charts What is the height of the pattern Payment methods Ask a question Reviews
 Electronic pattern for printing on a home printer or plotter in full size. Can be printed on sheets of paper from A4 to A0. Paperless cutting through the projector is possible.
My subscriber Natalia shared her experience in sewing men's embroidered shirts with photos of sewn products according to patterns.
 Irina Smirnova sent a photo of a sewn men's blouse in large sizes according to this pattern:
"Thank you very much to Vera for the wonderful patterns! I sewed a men's shirt-kosovorotka according to Vera's pattern. Everything is very clear and understandable! There were no problems! I will continue to use the wonderful patterns from Vera Olkhovskaya!"
Free download instructions on how to sew an embroidered shirt-kosovorotka shirt for this pattern
How to sew a men's shirt with or without embroidery according to a simple pattern for beginners with your own hands
Read this guide:
- Description of a set of ready-made patterns for a men's shirt.
- How to download and print PDF patterns.
- Features of a pattern of a men's shirt with their own hands.
- Shirt cutting options.
- How to sew a men's shirt for beginners step by step.
- How to sew a men's shirt video.
Description of a set of ready-made patterns for a men's shirt
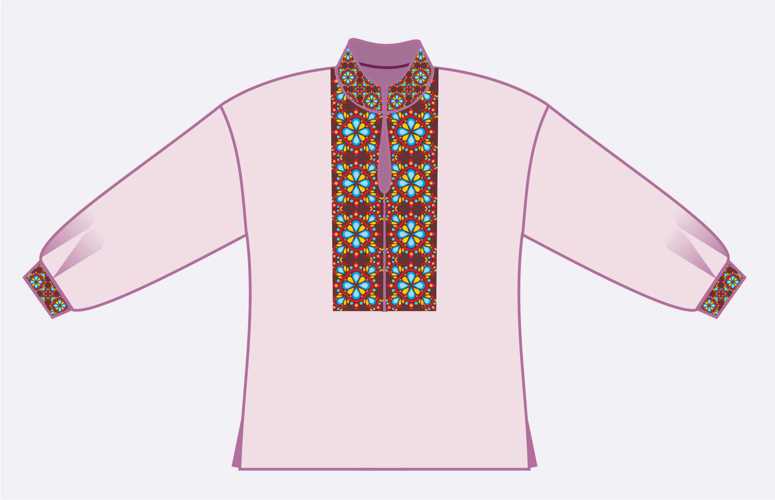
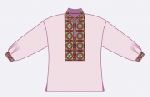
 Electronic pattern of vyshyvanka (kosovorotka) for men.
Sizes: 42 - 52 and 52-62.
File format for download in order:
PDF in full size and without seam allowances.
After paying for the order, you will receive links to download two files shirt patterns for each size gradation you choose:
- PDF file A4, adapted for printing patterns on sheets of A4 paper in any program on any device, including mobile phones.
- Multi-format PDF file for printing on sheets of any size from A0 to A4 on a printer or plotter using Adobe Reader.
Sewing difficulty level: easy.
The model is suitable for men with any figure.
For tailoring, use thin natural linen, chintz or cambric.
Fabric consumption depends on the size of the product and the method of processing.
The set of embroidered patterns includes patterns of the back, shelves and sleeves.
Cuffs and collar are rectangles and not included. How to cut them with your own hands is described below.
How to download and print PDF patterns
How to buy and download patterns.
How to print patterns life-size on A4 sheets.
Table of men's sizes from 44 to 60 - Conformity of the taken measurements to the standard sizes.
How to choose size without taking measurements and without tables.
Download for free so ready shirt pattern for a boy size 34-42.
Download this pdf shirt pattern for men in size from 42 to 62
Features of a pattern of a men's shirt with their own hands
Embroidery style nk is extremely simple (picture 1).
And since this is festive clothing, it can be sewn not only from thin linen and chintz, but also from cambric.
Embroidery can be performed both on the details of the product (shelf, collar, on the bottom of the sleeves or on the cuffs), and on a special fabric and then connected to the details of the product.
Attention! The sequence of work depends on whether the embroidery will be done directly on the shelf or you are using a ready-made embroidered border.
If embroidery is done directly on the shelf, then it must be completed before cutting and the sequence of work will be as follows:
- Pattern making.
- Marking parts with regard to hooping.
- Embroidery work.
- Cutting.
- Sewing.
When using an embroidered finished border, then we start with the manufacture of patterns, then we perform cutting and sewing.
It is imperative to cut an embroidered shirt with a side seam, since the use of a non-stop shirt sleeve implies its presence (read about the non-stop sleeve in the article "How to Sweep a Sleeve" и master class on knitting sleevesand "How to process a slot").
Shirt cutting options
 Seam allowances for all options are usual: shoulder, side - 1 cm; armhole, neck, sprout, okat - beyond the line of the outline of the pattern; on the bottom - 2 cm. The collar and cuffs are rectangles of the appropriate length. The width is calculated like this:
Double the width of the finished part + two seam allowances (1 cm each).
So, economic layout - with a middle seam on the back (picture 1).
The fabric is folded in half, the edges are aligned and parallel to the edge of the table.
Parts are stacked in the most economical way.
The disadvantage lies precisely in the middle seam of the back, since a straight seam greatly impairs the fit of the product and is the “weakest” point of the shirt.
Expect the embroidered shirt to tear right here.
To correct the lack of fit of the middle seam, you can use the design proposed on 3 drawing. The middle seam is marked, as in men's jackets and jackets.
To do this, we find the level of the shoulder blades (1/3 up from the armhole) and the waist level (in the middle between the level of the armhole and the bottom).
At the level of the waist, we retreat 2 cm and smoothly connect the resulting point with the level of the shoulder blades and a straight line with the bottom.
Note that it is difficult for owners of large sizes to get away from the economic layout, therefore, before buying fabric, make patterns and lay them out taking into account all the allowances and width of the fabric in order to calculate the consumption.
The next option is two-step layout (picture 2)
First, the shelf and back are cut out, and then the sleeve and small details.
This option is ideal for small and medium sizes.
The back is cut out in this case without a middle seam, that is, the back pattern is laid on the fold of the fabric.
Given that the shelf cannot be with a middle seam or fastener to the bottom, it should also be laid on the fold.
The fabric folding pattern is shown in the bottom "bubble".
After the shelf and back are cut out, fold the fabric in half along the width of the sleeve. The scheme is in the upper "bubble".
Finally, cut out two cuffs and a collar from the remnants.
cutting option for figures with a beer belly (3 drawing).
I must say that the use of the option with the assembly under the embroidered insert is rather narrow (picture 4 - ready product).
It is important to note that for such figures, the size of the pattern is selected according to the volume of the chest above the stomach, and the difference between Cr and St is added to the allowance for the abdomen.
It is also possible that the shelf will have to be lengthened by the difference between Ds and Dpt (see Fig. "Removal of measurements").

The layout in this case can be either with or without a middle back seam.
And the last option: if the front and back do not fit the width of the fabric (picture 5)
Fold the fabric in half along the width of the shelf.
Cut out the shelf.
Fold the fabric in half along the width of the back. Cut out the back.
The scheme of folding the fabric at the bottom of the figure. Then we fold the fabric along the transverse thread, which started in fig. 5 green dotted line and cut out the sleeves. From the rest - the collar and cuffs.
How to sew a men's shirt for beginners step by step
- We process a shelf - a cut for a fastener and, if we use an embroidered border, then we sew a border (see article "Processing the neck of the embroidered shirt"and "Processing the neck of the kosovorotka").
- We sew and overcast the shoulder seams or process them with a sewing seam (see. "Linen stitch").
- We iron them in accordance with the processing method.
- We process sleeve slots and warehouses.
- We iron.
- Stitch the non-stop sleeve in the same way as the shoulder seams.
- We process the side-sleeve seams and iron them.
- We measure the length of the neckline and the length of the bottom of the sleeve, we make the collar and cuffs according to the measurements obtained. The production is very simple: fold it in half lengthwise and grind the ends, iron them.
- We complete the processing by stitching the cuffs, collar and processing the bottom. We iron the product, we make ties and buttonholes on the cuffs.
Done!
How to sew a men's shirt video

Shirt sewing sequence video and shirt pattern for a boy for free
Recommended for beginners download a free pattern of such a shirt for a boy in sizes from 34 to 42, try to print and assemble it, sew a shirt according to the finished pattern to gain experience, and after that proceed to a large size men's shirt.
Download this pattern pdf:
Pattern of a shirt for a man's kosovorotka or vyshyvanka
$1.60 (64 hryvnia)
Bank cards of the Russian Federation are not accepted for payment!
Size charts What is the height of the pattern Payment methods Ask a question Reviews
Vera Olkhovskaya in social networks:

More patterns of models of a similar style or cut
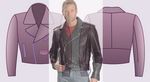
Pattern of leather jackets for men $2.50 |
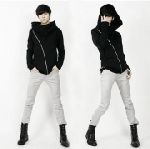
Pattern "men's leather jacket-hoodie" $2.00 |
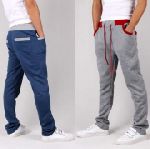
Pattern of sports trousers for men $2.00 |

Overalls for men with a slanting clasp $2.50 |
See similar clothing patterns and how to sew on them


-
Any pattern for free for a review of a previously made order
More...
Lifetime promotion for buyers of patterns!

Leave a review about my store of patterns for an order that you made before, and you will receive any paid pattern of your choice Free!
Catalog:
New patterns on the site


Most readable articles
- How to print patterns in full size on sheets of any format? Category: F.A.Q.
- Pattern of a dress for a babydoll girl Category: Dress patterns for free
- How to take measurements for sewing Category: Sewing: general questions
- How to sew a skirt without darts and without a pattern: "Tatyanka" Category: How to sew...?
- How to learn to sew from scratch at home for free? Category: F.A.Q.
- Skirt with a belt - how to sew a belt to a skirt and processing the belt when sewing a skirt for beginners Category: Waist section processing with and without belt
- How to choose a pattern size? Do Olkhovskaya patterns require a fit? Category: F.A.Q.
- Do-it-yourself parsley, Cossack and Gnome according to free patterns by Vera Olkhovskaya Category: How to sew a New Year's costume and costumes for the holidays with your own hands
New lessons and reviews
-
I sewed a boho trapeze dress size 42 according to your pattern
Category: Patterns - photos and reviews from users

-
I made two dresses with this pattern.
Category: Patterns - photos and reviews from users

-
Thanks for the fast order processing.
Category: Patterns - photos and reviews from users

-
When sewing, I slightly deepened the front neck
Category: Patterns - photos and reviews from users
