Size charts What is the height of the pattern Payment methods Ask a question Reviews
 Download for free Instructions on how to sew a blouse-shirt for this pattern...
An electronic pattern for printing a full-size blouse pattern on a home printer or plotter. Can be printed on sheets of paper from A4 to A0. Paperless cutting through the projector is possible.
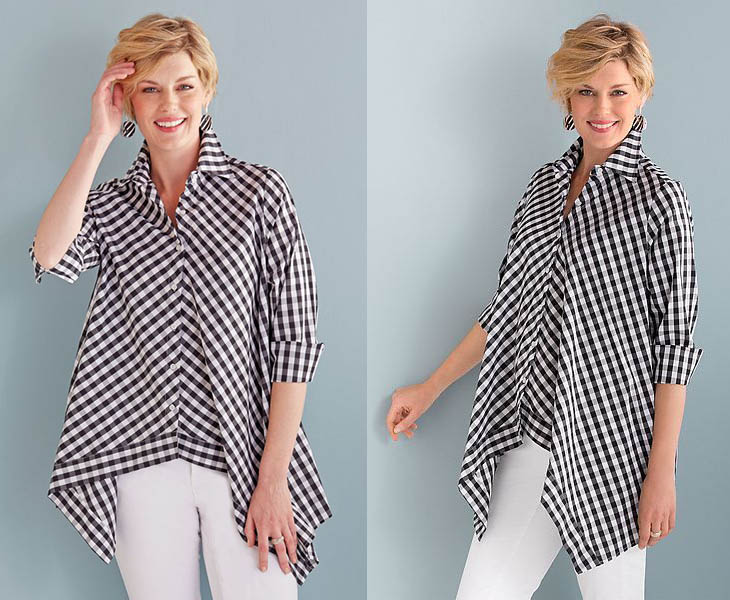
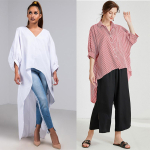
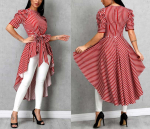
In the photo, look at the options for two blouses according to this pattern, sewn by the customer Lyudmila Kushnir:


"I'm sure that no recommendations are needed. The site is wonderful. After payment, the files with patterns and explanations for them arrive at the same minute and are downloaded very quickly. The patterns are accurate and accessible even to a beginner. A large selection of patterns. I'm extremely glad that I found this site. I sewed on model pattern - a flared shirt blouse with corners. I made one small change, lengthened the fastener in front by 10 cm, because on the pattern for larger sizes the front turned out to be short. "
 Buy and download this blouse pattern
How to sew a blouse shirt with your own hands using a simple pattern for beginners
Contents of the instruction:
- Description of the pattern and what to sew a blouse shirt from.
- How to buy, download and print an electronic pattern.
- Features of a pattern for beginners do-it-yourself shirt blouses.
- How to sew a blouse shirt for beginners step by step.
1. Description of the pattern and what to sew a blouse shirt from
 Electronic pattern of a simple flared shirt-blouse with 40-64 angles.
Sizes: 40-52 and 52-64 - the buyer receives ALL sizes of the selected gradation.
The file format of the electronic pattern of the shirt blouse:
PDF in full size and without seam allowances.
After paying for the order, you will receive links to download two files patterns of a blouse of a shirt of the gradation of the sizes chosen by you:
- PDF file A4, adapted for printing patterns on sheets of A4 paper in any program on any device, including mobile phones.
- Multi-format PDF file for printing on sheets of any size from A0 to A4 on a printer or plotter using Adobe Reader.
 Sewing difficulty level: easy. The model is suitable for any figure.
The pattern is designed for sewing at home on household sewing machines. When sewing, you can do without an overlock.
Complete set of blouse / shirt pattern
(picture 1):
- Back pattern.
- Shelf pattern.
- Sleeve pattern.
- Collar pattern.
Patterns for cuffs and strips for processing the bottom of the shelf are not included in the kit, as they are rectangles (strips of fabric). The calculation of the size of rectangular parts is given below.
Description of design and style variations
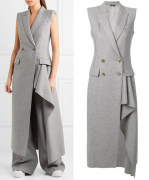
 A simple flared blouse without bust darts with non-stop sleeves and a one-piece stand collar. The hem is also one-piece, processed "in the hem".
The front and back have two bottom options, and the sleeve has three length options.
What to sew and how to calculate fabric consumption
Shirt fabric is traditionally used for sewing shirts.
In addition, thin linen, chintz, poplin, as well as fabrics from a silk assortment are suitable.
The main requirement is that the thickness of the fabric must be suitable for processing the collar, that is, it must be sufficiently dense and thin.
In addition to the fabric, you will need interlining to process the collar. The selection in the vast majority of cases is not worth gluing.
Consumption with a width of 140 cm will be from 150 to 220 cm, depending on the size. The consumption was calculated taking into account the bottom of the blouse, as in the photo.
2. How to buy, download and print an electronic pattern
How to choose a size without using tables and taking measurements.
What height are the patterns designed for.
How to buy and download a ready-made electronic pattern.
How to print a pattern at home in full size on A4 sheets or on sheets of any other format.
How to assemble a pattern after printing.
Ready-made patterns of dresses and sweatshirts in full size download for free.
3. Features of the pattern for beginners do-it-yourself shirt blouses
Having chosen the option for the bottom of the blouse and the option for processing the bottom of the sleeve, check the length of the sleeve and you can start cutting without any other preliminary preparation.
Yes, you can process the bottom of the sleeve without cuffs, but this will require correction of its length.
 Fold the fabric in half. Can be folded lengthwise (pictures 2 и 4) or across (picture 3). In any case, the edges must be combined.
We add seam allowances only to the collar. Do NOT add to other slices.
The cuff sizes are calculated by the formulas:
Cuff width = 2 finished widths + 2 cm
")
Cuff length = Wrist girth + 6 cm.
The width of the bar for processing the bottom is calculated as the width of the cuff, and its length should exceed the length of the bottom area to be processed by 5-7 cm in order to base it later (cut off exactly how much is needed in place).
Now about the shared thread and the middle seam of the back.
Of course, it is better to cut the back without a seam, laying the back pattern in the middle line on the fold of the fabric.
But, if the middle seam cannot be avoided, it is better to make it “oblique” (picture 3), laying the back with a slight turn.
Why is an oblique seam better than a shared seam? Because the oblique sections stretch a little and somewhat simplify the docking of the cells and the assembly of the product. The bias seam does not look tight and is easier to iron.
What you should know about the lobar thread of the shelf: the lobar thread must match the semi-skid (figures 2 - 3). But this is in the standard case, if you cut from a plain fabric or from a fabric with polka dots. The share thread along the semi-skid (the middle line of the shelf) protects the blouse from stretching.
But, if you cut fabric into a cage, then the board can be "oblique" (picture 4) as shown in the photo.
The bar and cuffs can be cut both along the lobar and along the transverse.
Pay attention to the corners of the pick - after processing, they will protrude a little and they will need to be trimmed, continuing the lines of the neck and bottom, that is, they will be ground.
Collar - share should coincide with the middle line. In addition, it is better to cut the collar last. And, if it is possible to try on a blouse, then it is worth cutting the collar after trying it on.
Why is it better to cut a collar after trying it on?
")
So that the size of the neck matches the thickness of the neck and your expectations.
It's no secret that broad-boned people have a much larger neck girth than thin-boned people, with the same chest girth. Neck corrections may require a figure with sloping shoulders, stooped or arched.
In addition, some fabrics can stretch a lot during processing, so it is better to postpone cutting the collar at the time of its processing. Collar seam allowances are determined by the need to fit the lower collar (the top of the lower collar becomes visible).
Allowances for the upper collar - 0,7 cm, allowances for the lower collar - 1 cm.
This implies another nuance of cutting the collar: the lower collar is cut along the upper collar.
That is, they put a pattern on the fabric and cut out the upper collar, then put the cut out upper collar and cut out the lower collar along it, retreating 0,1 cm for landing.
 This is the most accurate way to cut when custom-tailoring a blouse or shirt at home.
4. How to sew a blouse shirt for beginners step by step
- Let's start with how to process the sides. Here the selection is one-piece. We bend it twice, iron it, lay a fixing line. If the fabric has two faces, then you can fold the blouse “on the face”, make the stitches decorative and thus imitate the tuning bar. We iron after the line.
- Stitch, overcast and iron the shoulder seams. You can also to process the shoulder seams with a sewing (linen) seam. It is stronger, easier and does not require overcasting, but it is necessary to iron the seams after processing.
- We sew the sleeve, evenly distributing it along the armhole. Can be pierced with pins. We sew, overcast, iron. You can also use a linen seam.
- We grind the side-sleeve seam, iron it.
- We process the bottom of the sleeve in the chosen way. Cm. how to process the slot and cuffs
- We try on and, if necessary, cut the neckline and adjust the length of the blouse. To cut the neckline, fold the blouse in half, inserting one sleeve into the other. Pin it with tailor's pins, matching the sides, neckline and shoulder seams. Measure the cut and cut off the excess. Usually it is enough to cut off no more than 0,5 - 1 cm. For stooped figures - cut off in front, for kinky ones in the back.
- It is advisable to immediately base or shorten the bottom of the blouse. Compare the length of the sides - they should be the same. Trim the corners of the processed sides, compare the length of the side cuts from the armhole.
- Based on the length of the neckline, select the size of the collar. Open the collar as described above.
- Overstitch the collar by duplicating the flyaway part of the upper collar. Dubbing is cut out exactly according to the pattern without a rack and without seam allowances. It can be used as a dubbing as a collar dubbing (for hard collars), as well as a regular dublerin or interlining (for softer ones).
- After turning and turning, iron the collar. Establish the section of the rack by folding it in half.
- Stitch the collar into the neckline. First, we sweep the lower collar - from the middle to the side and from the other side to the middle from the side of the collar. We sew. We cut the seam. We bend and fasten the upper collar. We fix with a line or manually. We iron.
- We give the finishing line on the collar. We iron again. Necessarily.
- Then iron the hem bar in half lengthwise. Bend inward 0,7 - 1 cm from the side of one long cut. Stitch the loose end to the bottom. Get it right - cut off the excess from the side of the bead, leaving an allowance for turning the corner. Turn around the corner. Secure the bar with a stitch across the face.
- Work the remaining raw section of the bottom into an open or closed hem (single or double hem). Hem seam width - 0,7 - 1 cm.
- Loops, buttons.
Download this pattern pdf:
A simple pattern of a flared shirt-blouse with corners
$1.50 (60 hryvnia)
Bank cards of the Russian Federation are not accepted for payment!
Size charts What is the height of the pattern Payment methods Ask a question Reviews
Vera Olkhovskaya in social networks:

More patterns of models of a similar style or cut
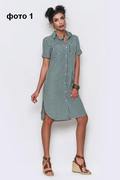
Pattern of a straight shirt dress $2.00 |

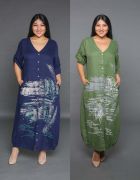
Dress pattern "tunic-shirt" $2.00 |
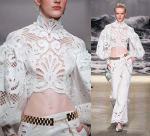
Boho shirt dress pattern $2.00 |

Pattern of a straight shirt dress with a one-piece sleeve $1.80 |
See similar clothing patterns and how to sew on them


-
Any pattern for free for a review of a previously made order
More...
Lifetime promotion for buyers of patterns!

Leave a review about my store of patterns for an order that you made before, and you will receive any paid pattern of your choice Free!
Catalog:
New patterns on the site


Most readable articles
- How to print patterns in full size on sheets of any format? Category: F.A.Q.
- Pattern of a dress for a babydoll girl Category: Dress patterns for free
- How to take measurements for sewing Category: Sewing: general questions
- How to sew a skirt without darts and without a pattern: "Tatyanka" Category: How to sew...?
- How to learn to sew from scratch at home for free? Category: F.A.Q.
- Skirt with a belt - how to sew a belt to a skirt and processing the belt when sewing a skirt for beginners Category: Waist section processing with and without belt
- How to choose a pattern size? Do Olkhovskaya patterns require a fit? Category: F.A.Q.
- Do-it-yourself parsley, Cossack and Gnome according to free patterns by Vera Olkhovskaya Category: How to sew a New Year's costume and costumes for the holidays with your own hands
New lessons and reviews
-
I sewed a boho trapeze dress size 42 according to your pattern
Category: Patterns - photos and reviews from users

-
I made two dresses with this pattern.
Category: Patterns - photos and reviews from users

-
Thanks for the fast order processing.
Category: Patterns - photos and reviews from users

-
When sewing, I slightly deepened the front neck
Category: Patterns - photos and reviews from users
