Size charts What is the height of the pattern Payment methods Ask a question Reviews
 Electronic pattern for printing in full size on a home printer or large-format plotter. It can be printed on sheets of paper from A4 to A0. Paperless cutting through the projector is possible.
For a variant of such a product with pockets, you can free download patch pocket patterns different styles at this link ...
 Free download Instructions on how to sew a tunic-shirt dress
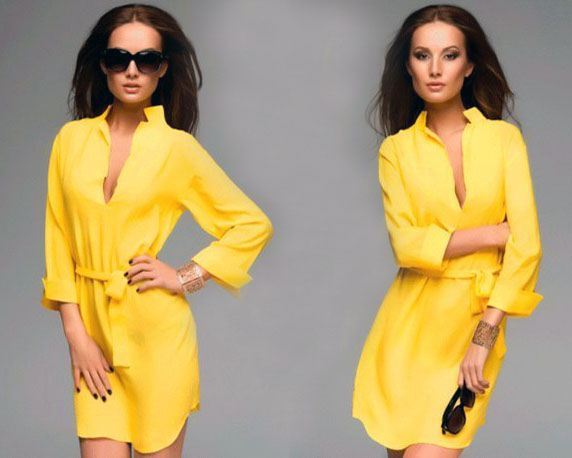
How to sew a straight shirt dress with your own hands according to a full-size pattern
Read this guide:
- What to sew, fabric consumption and a set of patterns.
- How to download and print patterns.
- How to sew a tunic shirt dress.
- How to cut for sizes up to 52.
- How to sew collars in a shirt dress.
- Cutting features for large sizes from 54.
✂ Fabric for a shirt dress, cost calculation and a set of patterns

Electronic pattern dress "tunic-shirt"
Sizes: 42-52 and 52-62 (the buyer receives all sizes of the selected gradation)
File format for download in order:
PDF in full size and without seam allowances.
After paying for the order, you will receive links to download two files patterns of a dress of the gradation of the sizes chosen by you:
- PDF file A4, adapted for printing patterns on sheets of A4 paper in any program on any device, including mobile phones.
- Multi-format PDF file for printing on sheets of any size from A0 to A4 on a printer or plotter using Adobe Reader.
The level of complexity of tailoring is medium.
The pattern is not suitable for beginner home couturiers, since in the process of sewing a “tunic-shirt” dress, you will have to process a collar on an open neck with a slit and cuffs, also with a slit.
 All patterns of the tunic-shirt set are shown on 1 drawing. This is a back, a shelf, a collar and a shirt sleeve with marks of various lengths.
For a variant of such a product with pockets, you can free download patch pocket patterns different styles at this link ...
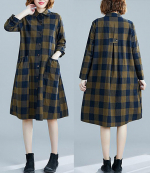
This model of a straight shirt dress is suitable for all types of figures and builds, as well as for all ages and sizes.
For sewing this dress, you can choose both fabrics from the dress assortment and shirts. Main requirements: the fabric must be thin and stable. Stretch and chiffon are not suitable. From denim fabrics, you should choose only the thinnest. The ideal choice is shirt chintz or linen.
The fabric consumption calculation is very simple. For sizes 42 - 52, we calculate according to the formula:
Shelf detail length + Dr (sleeve length measurement) + 10 cm
For sizes 54 - 62 even easier:
Shelf part length + Back part length + 10 cm.
How to download and print this pattern
✂ How to print a full size pattern on A4 sheets
✂ How to easily determine the size without taking measurements
 Buy and download this pattern
✂ How to sew and cut a "tunic shirt" dress using a pattern


We start cutting with a part that will play the role of a selection and a lapel, as well as a facing for a cut.
In order not to be mistaken, measure the length of the incision down from the jugular cavity according to the customer's figure.
And measure the resulting value (picture 2) from the highest point of the half-skid of the shelf. Put a mark on the pattern
Then, lay the shelf pattern on the doubler folded in half. The pattern is superimposed with a semi-skid (middle line) of the shelf on the fold of the dublerin and is circled without allowances for the seams, as shown in the figure.
On the detail of the trim-facing (let's call it based on the functions), mark the middle line and the length of the cut. But you do not need to cut, do it in the process of sewing.
You will have to stick the resulting dubbing part on the fabric after cutting the main parts and we will return to this in the description later.
 Now for the sleeve. As mentioned above, it is shirt-like, that is, non-stop and therefore does not require stitching before stitching.
You have probably already seen video master class on sewing for beginners about how to sew in a sleeve without stitching.
You can sew this dress with a "classic" shirt sleeve, which has cuffs and a slit (figure 3 a-b).
Watch video sewing lessons for beginners along the slot and cuff on the example of sewing a blouse.
But, if you want to sew the sleeve shown in the photo, cut or fold the pattern to the mark of the desired length (figure 3 a).
Then, cut out the sleeves of the cuffs according to this pattern - a strip 5 cm wide without allowances for seams and mark the middle line on it (strip) (figure 3 in).
When cutting, we will use both a pattern and a cuff strip (figure 3 g), but more on that later.
✂ How to cut a shirt dress for sizes 42 to 52
 Now let's move on to considering cutting sizes 42 - 52 (picture 4).
To save fabric, cutting should be done in two steps. First, we cut out the shelf and back, folding the fabric in such a way that both parts are seamless.
Then, we also fold the rest of the fabric for the sleeve and the selection of the facing.
Pay attention to allowances.
Shoulder, side and bottom shelves and backs - 1 cm each. There is no need to add an allowance for the sprout, neck and armhole - we cut out the pattern for the stroke line. Don't forget to put a notch on the neckline to mark the place where the collar will end.
Allowances for the sleeves are as follows: add 1 cm to the front and back seam, no allowance is needed along the rim, and add on the cuff along the bottom. To correctly calculate how much you need for cuffs, apply a 5 cm strip to the cuff pattern and add another 8 cm (Figures 3 g и 4).
We cut out the edge-turning after we stick the part from the dubbing on the fabric (drawings 2, 3 и 4). Allowances for seams in this case are added only on the shoulder 1 cm and on the neck no more than 5 mm.
✂ Features of cutting and sewing collars in this dress
Cutting the lower and upper collars requires a special approach, so we proceed to it after trying on and processing the shoulder seams.
In the kit you have two collars - one is narrower, the other is wider. Before trying on, make their patterns of the largest size.
During the fitting, you will choose a collar that you like, and after the fitting - its size.
This sequence must be observed because the collar should be cut in accordance with the length of the neck.
We bend the excess length of the collar pattern along the middle cut or cut it off and cut out the lower collar from the doubler.
You need to know that the shared thread in the lower collar, cut out according to the English type, runs along the rake line (the final segment of the stitching seam). On the 4 drawing the loose collar of the lower collar adjoins the hem.
The lower collar from dubbing is glued onto the remnants of the fabric in compliance with the above-described shared direction and cut out with seam allowances of 0,7-0,8 cm. No more!
The middle seam of the lower collar is ground down, and then the upper collar is cut along it with allowances of no more than 1 cm.
Thus, the upper collar turns out to be larger than the lower collar by the amount of edging, which should be obtained when turning.
The finished collar is sewn into the neck, and then comes the turn of the selection-turning.
The hem should be placed on the shelf face to face and the lapels and slit should be overcast with one line, taking into account the necessary fit on the lapel.
As for the cuff on the sleeve, it should be processed even before the sleeve is sewn in.
On the details of the sleeve from the wrong side, a cuff-strip of dublerin is glued, as shown in fig. 3 g, 4, 5. The allowance below dubbing is folded over to the “face” and a cut is made on the cuff. Then, the incision should be cut, twisted, swept and ironed.
Finally, overcast the lower open section, iron again and glue the open section.
The cuff is ready. The sleeve can be sewn in and only after that the side-sleeve seam can be sewn ...
✂ How to sew a shirt dress for sizes 54 and up

It is better to carry out it in several stages. We start, as usual, with the largest details - shelves and backs. Fold the fabric in half face to face so that the distance between the fold and the edge is equal to the width of the shelf with seam allowances.
Then, fold the fabric across for the sleeve, not forgetting the allowance for the cuff if we make the sleeve, as in the photo.
Lastly, after trying on from the remaining fabric, we cut out the piping and collars.
In a word, we do everything and cut it out in the same sequence as for small sizes.
Download this pattern pdf:
Dress pattern "tunic-shirt"
$2.00 (80 hryvnia)
Bank cards of the Russian Federation are not accepted for payment!
Size charts What is the height of the pattern Payment methods Ask a question Reviews
Vera Olkhovskaya in social networks:

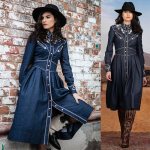
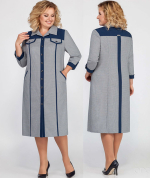
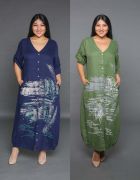
See similar clothing patterns and how to sew on them


-
Any pattern for free for a review of a previously made order
More...
Lifetime promotion for buyers of patterns!

Leave a review about my store of patterns for an order that you made before, and you will receive any paid pattern of your choice Free!
Catalog:
New patterns on the site


Most readable articles
- How to print patterns in full size on sheets of any format? Category: F.A.Q.
- Pattern of a dress for a babydoll girl Category: Dress patterns for free
- How to take measurements for sewing Category: Sewing: general questions
- How to sew a skirt without darts and without a pattern: "Tatyanka" Category: How to sew...?
- How to learn to sew from scratch at home for free? Category: F.A.Q.
- Skirt with a belt - how to sew a belt to a skirt and processing the belt when sewing a skirt for beginners Category: Waist section processing with and without belt
- How to choose a pattern size? Do Olkhovskaya patterns require a fit? Category: F.A.Q.
- Do-it-yourself parsley, Cossack and Gnome according to free patterns by Vera Olkhovskaya Category: How to sew a New Year's costume and costumes for the holidays with your own hands
New lessons and reviews
-
I sewed a boho trapeze dress size 42 according to your pattern
Category: Patterns - photos and reviews from users

-
I made two dresses with this pattern.
Category: Patterns - photos and reviews from users

-
Thanks for the fast order processing.
Category: Patterns - photos and reviews from users

-
When sewing, I slightly deepened the front neck
Category: Patterns - photos and reviews from users
