Size charts What is the height of the pattern Payment methods Ask a question Reviews

PDF pattern for printing on a printer or plotter in full size for dress sizes from 40 to 54 (all sizes in one file).
File format for download in order:
PDF in full size and without seam allowances.
After paying for the order, you will receive links to download two files dress patterns gradation sizes from 40 to 54:
- PDF file A4, adapted for printing patterns on sheets of A4 paper in any program on any device, including mobile phones.
- Multi-format PDF file for printing on sheets of any size from A0 to A4 on a printer or plotter using Adobe Reader.
Sewing difficulty level: simple - a pattern for beginners who have already mastered sewing skirts, including Tatyanka skirts.
See, how to sew a skirt "Tatyanka" with warehouses or assembly.
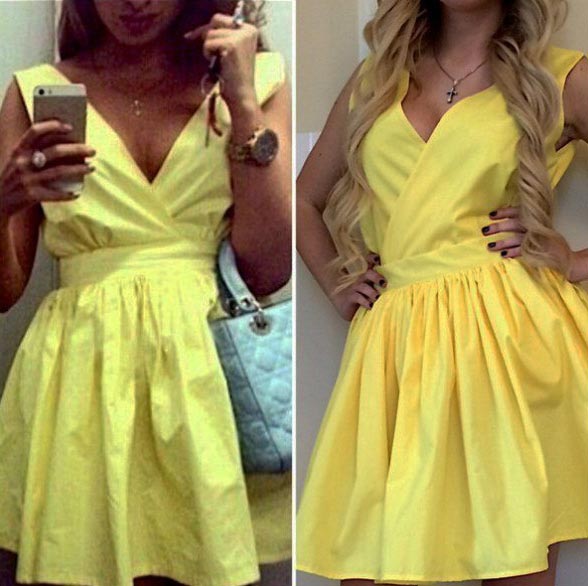
 Included in the set of patterns Tatyanka's dresses with a bodice that has a smell are included (Fig. 1): patterns for the front and back.
The pattern of the “Tatyanka” skirt - a rectangle - is not included in the set of patterns, but the cutting is described in detail below.
This style of dress is suitable for slim girls.
Various stable fabrics can be used for sewing: chintz, fine linen, thin denim (printed or plain), poplin and silk. Chiffon, cambric and stretch are not suitable for this style.
The consumption of fabric for the "dress-Tatyanka bodice with a smell" will be
Bodice length + Tatyanka skirt length + 15 cm for seams and processing
But, if you need a very puffy skirt, then the skirt will need 2Du (length of the skirt) and then the flow formula will look like this:
Bodice length + 2D + 20 cm for seams and processing
How to choose a pattern size without taking measurements and using size charts
How to print a pattern at home in full size on A4 sheets
Ready-made patterns for children in full size free download
Cutting and sewing a detachable dress with a Tatyanka skirt and a wraparound bodice
 Consider the details of the bodice and first deal with the names of lines and sections (Fig. 1).
The middle line of the back is a straight line, which should coincide with the share direction. In other words, the center line of the back is perpendicular to the cut of the waist and it does not coincide with the curve of the center seam.
As for the shelf, the most important line is the half skid - this is the middle line, which coincides with the middle line of the human figure, and when the right shelf is superimposed on the left, the half skid lines should coincide with each other. Therefore, when cutting, it is recommended to mark the semi-skid with threads on the parts and keep this markup until the product is ready.
The edge of the side - the line of the edge of the side at the intersection with the semi-skid forms the point of convergence of the shelves, which is also very important. The name of the point indicates that the sides of the right and left shelves intersect in it.
Do not forget that the point of convergence and half-skid should be marked on both shelves with white thread immediately after cutting.
Normal seam allowances (Fig. 2): add 1 cm along the side, shoulder and middle back seams; at the waist - 3,5 - 4 cm for the convenience of fitting. Please note that seam allowances are not added along the sprout (this is the name of the neck of the back) and along the armhole.
As seen in fig. 2, an allowance of 3,5 - 4 cm is added to the line of the edge of the side. This is a one-piece selection, which is duplicated with a strip of adhesive interlining or dublerin. This approach reduces sewing time and improves the quality of the product.
 The sprout of the back can be processed with a facing, which is first cut out from a dublerin or interlining along the back pattern without seam allowances, and then glued to the fabric and cut out already with the necessary allowances of 1 cm along the side and middle seam.
The cutting sequence is as follows (Fig. 3).
The fabric is folded in half face to face, the edges are aligned with each other and are parallel to the edge of the cutting table.
The cuts are aligned on one side - aligned at right angles to the edges.
The patterns of the shelves and backs are laid on the fabric with a "jack". The frontal edge coincides with the bead cut - the shelf pattern is laid 3,5 - 4 cm from the fabric fold in order to provide an allowance for a one-piece hem.
The back is located on the fabric so that the cut of the waist is strictly parallel to the fitted cut. In other words, the cut of the waist is perpendicular to the edges.
When the details of the back and shelves are cut out with the necessary allowances for the seams, a rectangle is cut off for the “Tatyanka” skirt, taking into account its length and the hem of the bottom.
Based on the above fabrics suitable for sewing this style, the bottom should be processed with a hem with a closed cut, that is, “fold twice”.
See, how to trim the bottom of a dress
Then, we cut out a slanting inlay for edging the armholes.
Lastly, we glue the stitching of the sprout on the remnants of the fabric and cut it out with 1 cm allowances along the middle and shoulder seam. The remaining sections are without seam allowances.
The sewing of this dress is very simple: a bodice, a skirt are made, a fitting is performed and the bodice is connected with the skirt. Now a little more.
We start with the processing of tucks. On the shelf there can be both a tuck and an assembly. Gathering on the shelf should be done from the first line of the tuck to the side seam so that the shelf overlap area is without gathering.
See video tutorial on how to assemble
After darts and assembly, you should stick the dubbing on the edge and bend and iron it. When the selection is ready, you can sweep the shoulder, side seams and the middle seam (on average - “lightning”) and try on.
On the fitting, the length of the bodice is determined - the bodice is not tied with a thin belt or linen elastic at the waist. Waist level is marked on the figure. In this case, the half-sliding of the shelves must coincide with each other and with the middle line of the customer's figure.
After trying on, the shoulder seams are ground, overcast and ironed, the facing is sewn to the collar and the sprout is turned. The armholes are edged, the side seams are ground, ironed and overcast.
Then assembly is performed on the “Tatyanka” skirt and its only seam is ground off, while part of the seam under the “zipper” remains unstitched. The seam is ironed out and the skirt is ready to be connected to the bodice.
The bodice is connected to the skirt - it is ground, overcast, the seam is ironed. The zipper is sewn on and the bottom is processed.
Download this pattern pdf:
Pattern "Dress-Tatyanka bodice with a smell"
$1.00 (40 hryvnia)
Bank cards of the Russian Federation are not accepted for payment!
Size charts What is the height of the pattern Payment methods Ask a question Reviews
Vera Olkhovskaya in social networks:

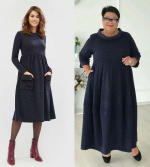
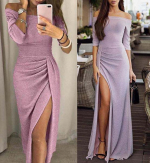
See similar clothing patterns and how to sew on them


-
Any pattern for free for a review of a previously made order
More...
Lifetime promotion for buyers of patterns!

Leave a review about my store of patterns for an order that you made before, and you will receive any paid pattern of your choice Free!
Catalog:
New patterns on the site


Most readable articles
- How to print patterns in full size on sheets of any format? Category: F.A.Q.
- Pattern of a dress for a babydoll girl Category: Dress patterns for free
- How to take measurements for sewing Category: Sewing: general questions
- How to sew a skirt without darts and without a pattern: "Tatyanka" Category: How to sew...?
- How to learn to sew from scratch at home for free? Category: F.A.Q.
- Skirt with a belt - how to sew a belt to a skirt and processing the belt when sewing a skirt for beginners Category: Waist section processing with and without belt
- How to choose a pattern size? Do Olkhovskaya patterns require a fit? Category: F.A.Q.
- Do-it-yourself parsley, Cossack and Gnome according to free patterns by Vera Olkhovskaya Category: How to sew a New Year's costume and costumes for the holidays with your own hands
New lessons and reviews
-
I sewed a boho trapeze dress size 42 according to your pattern
Category: Patterns - photos and reviews from users

-
I made two dresses with this pattern.
Category: Patterns - photos and reviews from users

-
Thanks for the fast order processing.
Category: Patterns - photos and reviews from users

-
When sewing, I slightly deepened the front neck
Category: Patterns - photos and reviews from users
