Size charts What is the height of the pattern Payment methods Ask a question Reviews

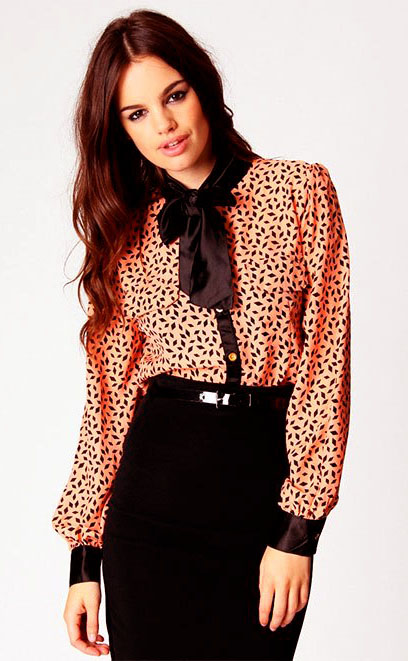
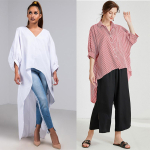
Electronic patterns of a blouse "classic with a bow" 40-62.
Sizes: 40-52 and 52-62 (in the file you get all the sizes of the selected gradation).
File format for download in order:
PDF in full size and without seam allowances.
After paying for the order, you will receive links to download two files patterns of a blouse of the gradation of the sizes chosen by you:
- PDF file A4, adapted for printing patterns on sheets of A4 paper in any program on any device, including mobile phones.
- Multi-format PDF file for printing on sheets of any size from A0 to A4 on a printer or plotter using Adobe Reader.
Sewing difficulty level: easy - the pattern is recommended for beginner couturiers who have already mastered the sewing of a pencil skirt. Beginners are advised to use the simplest bow collar and non-stop sleeve.
The set of blouse templates includes a back, a shelf, a non-stop sleeve and a straight sleeve, providing for a fit around the collar, as well as a bow collar, a collar with a bow and a classic collar on a one-piece stand (Fig. 1).
 The consumption of fabric for a blouse with a bow and long sleeves, depending on the size, will be from 130 to 160 cm. This is with a fabric width of 140 cm and while maintaining the length of the blouse.
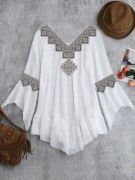
The style of this blouse is suitable for all types of figures and for any age.
For sewing, it is better to use thin fabrics traditional for blouses. Well suited shirt chintz, thin linen, thin denim. These fabrics are the easiest to process and can be recommended for beginners. Experienced tailors can choose fabrics that are more difficult to process: fine silk, chiffon, crepe chiffon or poplin.
How to choose a pattern size without taking measurements and using size charts
How to print a pattern at home in full size on A4 sheets
How to assemble a pattern on several sheets (video lesson)
 Download free patterns of dresses and blouses for girls
How to cut a classic blouse with a bow
Cutting blouses, despite its simplicity, has a number of features that are always missed by novice couturiers.
You should start, like other models, with thinking about the details, the most difficult of which is the clasp.
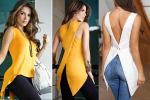
For a blouse with a bow, we can process three options for fasteners (Fig. 2).
First: the clasp is a cut along the half-skid (the middle line of the shelf), which can simply be turned over.
Second: a clasp with a tuning bar - which you see in the photo above. For it, you will need an allowance for a semi-skid from 1,5 to 2 cm. No more! An allowance of 1,5 cm corresponds to a plank, the width of which in the finished form is 2 cm, and in cutting 3 - 3,2 cm. An allowance of 2 cm corresponds to a plank, the width of which in finished form is 3 cm, and in the cut - 4 - 4,2, XNUMX.
 Please note that when cutting the setting bar, we are talking about millimeters. High accuracy is important here, so it is recommended for beginners to perform this fastener option only on “simple” fabrics.
And the third fastening option - a one-piece selection - is the simplest. The allowance for a one-piece selection will be 5 - 6 cm. At the same time, 1,2 - 1,5 cm is the distance to the edge of the side, and the rest is exactly the selection, which can be duplicated with a thin adhesive interlining or the thinnest stretch doubler. True, in most cases, dubbing is not required, as it makes the fastener rougher than we would like.
The rest of the seam allowances along the front and back are as follows: shoulder and side seams - 1 cm each; armholes, neck, sprout (back neck) - cut out without allowances.
The hem of the sleeve is also without allowances, and for the rest of the sections - 1 cm each. In the sleeve with a fit and the non-stop sleeve, the allowances for the seams are the same.
Please note that it is advisable to compare the length of the sleeve with the length of the sleeve of your favorite blouse. Don't forget that the cuffed sleeve needs a little slouching, meaning it shouldn't be pulled tight on the arm.
 And one more question regarding sleeves with a fit: why in the patterns of large sleeves there is a tuck along the collar. It is needed in order to take away the excess fit on the collar, which prevents the sleeves from fitting well in products of large sizes.
Now about the slot. When cutting, it should not be cut, especially since it can be continuous.
See how to sew a slit on a blouse
Now about the collars, which should be cut out after trying on the blouse, when the shoulder seams and sides are already fully processed. This sequence is due to the fact that it is easier to choose the size of the collar according to the length of the neck of the product, which is sometimes cut off during fitting. The declared size of the collar may not match the size of the neck of the blouse.
The easiest to process is the “collar-bow”, and the most difficult is the “collar with a bow”.
Seam allowances for all collars - 0,7 - 1 cm, except for the stitching cut - at least 1 cm allowance for it.
When cutting the collar, it is also important to add seam allowances to the nearest millimeter.
See video tutorials on sewing how to cut and sew a collar
Now that the difficult questions are over, let's move on to a very simple cutting of a blouse (Fig. 3 - 4).
 The fabric, as usual, is folded in half face inward, the edges are aligned and parallel to the edge of the cutting table.
Patterns are laid out taking into account the shared direction: the back is on the fold of the fabric, and the shelf is towards the edges.
In most cases, the sleeve is cut so that the share runs along the part. To determine exactly, fold the sleeve pattern in half, aligning the seams and iron the fold of the paper with your palm - the fold will be the share direction.
The sleeve can also be cut along an oblique thread, an oblique cut is especially good for striped and checkered fabrics.
The tuning bar must be cut along an oblique thread and without additional stitches, in other words, it must be solid.
Do not forget to put notches on the front and back in places where the side seam goes to the rounding of the bottom.
We cut the collar after trying it on.
The collar-bow can also be cut along the lobar (along the lobar), as in fig. 3 and along the transverse thread (along the transverse).
It is advisable to cut a collar with a bow along the transverse thread, like a regular "shirt" collar. The middle line is on the fold of the fabric.
Cuffs - rectangles - can be placed in any share direction.
Cuff width = 2 finished widths + 2 cm for seams
Cuff length = Wrist circumference (not tight) + 4 cm for the transition part + 2 cm for allowances.
How to sew a blouse with a bow
 We start with the processing of the sides or the slit fastener, which is edged.
If you have chosen a one-piece bead, it is simply ironed (attention!) along the line of the edge of the bead.
If these are planks, then the allowances are ironed on one side, stitched on the side of the other allowance and then ironed, and the previously ironed allowance is adjusted and the processing of the adjusting bar is completed with finishing lines.
Then the tucks on the shelf are ground and ironed.
The shoulder-side seams are also ground down, overcast and ironed, but there is a nuance.
Shoulder seams: After seaming, both seams should be overcast together and ironed.
Side seams: after sewing to the notch, overcast each allowance separately, going to the bottom with a single line. Iron the side seams only to the notch. The rounded bottom is easier to process, before ironing. We process the bottom into a hem with an open cut - we fold it 1 time and lay a line.
And one more nuance that is important for blouses of large sizes. Before sewing the side seams, glue the bottom bartack area with small (2x2 cm) pieces of dubbing. This will keep the side seams at the bottom from tearing.
We assemble the sleeve: we process the slot, grind and iron the seam, cuffs and connect the sleeve with the cuff.
See sewing master class video how to join a cuff to a sleeve
And you can sample.
On the fitting, we specify the line of the armhole and neck. We sew in the sleeve or sew it in without sewing it in and try it on again.
How to Sweep a Sleeve Video sewing lesson
How to sew a sleeve without stitching video sewing
Only the collar, loops and buttons remain.
See video master class about sewing loops
Download this pattern pdf:
Pattern of a blouse "classic with a bow"
$1.50 (60 hryvnia)
Bank cards of the Russian Federation are not accepted for payment!
Size charts What is the height of the pattern Payment methods Ask a question Reviews
Vera Olkhovskaya in social networks:

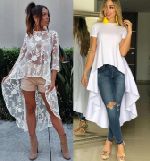
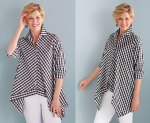
More patterns of models of a similar style or cut
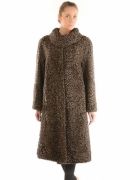
Fur coat classic semi-raglan $3.00 |

Pattern of men's trousers "classic" $2.00 |

Jeans pattern "Classic" $2.00 |

Pattern coat-jacket "new classic" $3.00 |
See similar clothing patterns and how to sew on them


-
Any pattern for free for a review of a previously made order
More...
Lifetime promotion for buyers of patterns!

Leave a review about my store of patterns for an order that you made before, and you will receive any paid pattern of your choice Free!
Catalog:
New patterns on the site


Most readable articles
- How to print patterns in full size on sheets of any format? Category: F.A.Q.
- Pattern of a dress for a babydoll girl Category: Dress patterns for free
- How to take measurements for sewing Category: Sewing: general questions
- How to sew a skirt without darts and without a pattern: "Tatyanka" Category: How to sew...?
- How to learn to sew from scratch at home for free? Category: F.A.Q.
- Skirt with a belt - how to sew a belt to a skirt and processing the belt when sewing a skirt for beginners Category: Waist section processing with and without belt
- How to choose a pattern size? Do Olkhovskaya patterns require a fit? Category: F.A.Q.
- Do-it-yourself parsley, Cossack and Gnome according to free patterns by Vera Olkhovskaya Category: How to sew a New Year's costume and costumes for the holidays with your own hands
New lessons and reviews
-
I sewed a boho trapeze dress size 42 according to your pattern
Category: Patterns - photos and reviews from users

-
I made two dresses with this pattern.
Category: Patterns - photos and reviews from users

-
Thanks for the fast order processing.
Category: Patterns - photos and reviews from users

-
When sewing, I slightly deepened the front neck
Category: Patterns - photos and reviews from users
