Size charts What is the height of the pattern Payment methods Ask a question Reviews
PDF pattern for printing on a printer or plotter in full size for dress sizes from 40 to 54.
How to sew a do-it-yourself dressing gown with buttons using this pattern
Contents of the instruction:
- From what to sew, what is in the set of patterns and the consumption of fabric for a dressing gown.
- How to download, print and collect patterns.
- How to sew a dressing gown with your own hands.
- How to cut to different sizes.
- How to try on when sewing.
- Features of marking buttonholes in a dressing gown.
From what to sew a dress robe, a set of patterns and fabric consumption
 Electronic pattern dressing gown detachable top without buttons.
Sizes: 40-54 (buyer gets ALL sizes)
File format for download in order:
PDF in full size and without seam allowances.
After paying for the order, you will receive links to download two files dressing gown patterns gradation sizes from 40 to 54:
- PDF file A4, adapted for printing patterns on sheets of A4 paper in any program on any device, including mobile phones.
- Multi-format PDF file for printing on sheets of any size from A0 to A4 on a printer or plotter using Adobe Reader.
Sewing difficulty level: medium, pattern for beginners is not recommended. In addition to the pocket, you should correctly try on.
 The set of patterns for a dressing gown without a top includes the following patterns (Fig. 1):
- bodice pattern - back and shelf with a one-piece selection;
- skirt pattern - ZP and PP with a one-piece selection;
- patterns of burlap pockets "cut barrel"
- sleeve pattern.
Fabric consumption for this robe dress with a width of 140 cm, depending on the size, it will be from 125 to 150 cm.
Of course, this is while maintaining the length of the skirt and sleeves.
What to sew from?
 Almost all thin fabrics of the dress assortment are suitable for sewing.
The most suitable are:
- shirt chintz;
- battist;
- thin linen;
- thin jeans;
- dress satin;
- poplin;
- staple.
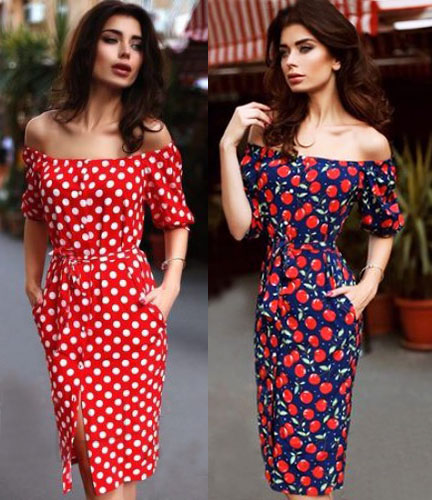
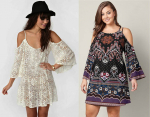
This style is suitable for almost all types of female figures.
How to download, print and assemble do-it-yourself robe dress patterns
How to choose size patterns without taking measurements and using size charts
How to print a pattern at home in full size on A4 sheets
How to assemble a pattern, consisting of several large sheets, watch the video master class
Download Free Life Size Dress Patterns for Beginners
How to sew a do-it-yourself button-down dressing gown without a top

Sewing according to ready-made patterns in full size is greatly facilitated if possible ways of sewing a dress are thought out before cutting.
Let's focus on the simplest and most convenient option. Consider for a start the allowances for the seams (Fig. 2).
Please note that the selection in this dressing gown is one-piece - this not only reduces processing time, but also improves sewing quality.
Open see:
- for small dress sizes in figure 3;
- for a medium-sized robe dress in Figure 4.
 For reasons of economy, small details can be cut out at the lunge of the fabric (Figure 3) - the burlap-valance is cut out last in a turn.
On the bottom of the details of the bodice, you will need an allowance of 3 - 4 cm in order to accurately determine the length of the bodice when trying on.
To do this, the bodice is tied with a linen elastic band and the waist level is marked along it. As practice shows, many home couturiers are not aware that the level of the bottom of the bodice in the product must strictly coincide with the waist on the figure.
It is also important to understand that the length of the front and back, as well as the ratio of these lengths, are different for each woman. The ratio of the lengths of the back and shelves is not related to completeness. Therefore, the position of the elastic (lace) on the fitting for each customer is individual and what remains below the elastic can be of different widths in different parts of the bodice.
For example, with a stooped back, a small chest and a short shelf, the bodice will be longer in front.
With a large chest and a short back, the back will be longer, that is, it will protrude from under the belt (elastic band) below.
It is for such an accurate correction of the length of the bodice that a sufficiently large allowance is needed along the bottom. If the product has a belt, then on the fitting you can determine the exact amount of overlap. In this case, the overlap can be more in the back and less in the front - as you like.
 Shared direction in the details of the bodice:
for the back, the share is strictly perpendicular to the waist, and for the shelf, the share coincides with the line of the half-skid and, of course, with the line of the edge of the side.
Consider carefully the one-piece selection of the bodice:
it repeats the concave upper cut of the bodice and along the width of the selection in the upper part (in Figure 2 the desired segment is indicated by a curly bracket), an allowance should be made along the upper cut of the back and sleeve.
We do not make allowances for the armhole, the upper cut of the shelf, the take-off cut. If you add, the concave sections will become shorter than necessary.
As for the details of the skirt, allowances are not made along the waist cut and along the cut of the pocket entrance. To hem the bottom 2,5 - 3 cm.
The share thread in the details of the skirt is perpendicular to the bottom and half-skid.
I remind that half skid - this is the center line of the product, coinciding with the center line of the torso in front.
The remaining seam allowances are 1 cm.
See video master class how to do a fitting on the example of sewing a dress "a peasant lady"
How to cut to different sizes
(pictures 3 and 4)
As usual, first fold the fabric in half face to face, matching the edges and placing them parallel to the edge of the cutting table.
For small sizes (Figure 3), in order to save money, cutting is carried out in two stages.
We cut out everything except the burlap-valance. This detail can be cut out by unfolding the remaining lunge, as shown in the figure.
With large sizes, everything is easier (Figure 4).
 DIY sewing sequence at home and in factories is certainly different, but it should be strictly observed:
- The task of the home couturier is to first assemble the bodice, then the sleeve, connect them, assemble the skirt (the pockets must also be processed).
- Then the sleeve is tucked in and a fitting is performed on which the length of the bodice should be adjusted.
- Finally, the bodice is connected to the skirt and the top and bottom are processed.
- Loops, buttons.
- When assembling the bodice, we start by sweeping and ironing all the folds and, if there is a tuck on the back of the bodice, then we grind and iron the tuck.
- Then, we iron (or duplicate and iron) the selection; ironing the back allowance along the upper cut; we grind, weave and iron the middle seam of the back and side seams.
- We iron the allowance along the upper cut of the sleeve, grind, overcast and iron the sleeve seam. We grind the upper cut of the shelf. We knit the sleeve. Please note: the gathered sleeve is tucked into the gathered bodice. Only in this order. The drawstring is only swept and the elastic is pulled in.
- The assembly of the skirt also begins with the storage and ironing of the hem. After that, the “cut-off barrel” pocket is processed.
See video how to sew a pocket
How to try on a gown dress
First, the bodice of the dress is put on the customer, it is tied with an elastic band to accurately determine its length. Along the way, the fit of the bodice on the figure is specified.
Then, without removing the bodice, the skirt is tried on.
Features of marking buttonholes in a dressing gown
The final steps of sewing are very simple, but it should be said separately about the marking of buttonholes.
If the dressing gown will be worn without a belt, then it is good to make a loop right in the seam of the connection between the bodice and the skirt, that is, at the waist.
This is not difficult: the line is made with a gap (“gap”) for the loop, the gap is limited to bartacks. The seam in this area must be ironed out. Such a “gap” of the line should be done both on the shelf and on the edge.
Another one "mandatory" buttonhole done at the level of the bulge of the chest. The rest are marked randomly.
If the dressing gown is worn with a belt, then "mandatory" loop one - at chest level.
Download this pattern pdf:
Pattern "dress-robe detachable without top"
$2.00 (80 hryvnia)
Bank cards of the Russian Federation are not accepted for payment!
Size charts What is the height of the pattern Payment methods Ask a question Reviews
Vera Olkhovskaya in social networks:

More patterns of models of a similar style or cut

Off Shoulder Kimono Dress Pattern $1.00 |

One shoulder dress pattern $2.00 |

patterns "cut-off dresses without a top with puffy sleeves" $2.00 |

Pattern of a cut-off dress without a top with reliefs $2.00 |
See similar clothing patterns and how to sew on them


-
Any pattern for free for a review of a previously made order
More...
Lifetime promotion for buyers of patterns!

Leave a review about my store of patterns for an order that you made before, and you will receive any paid pattern of your choice Free!
Catalog:
New patterns on the site


Most readable articles
- How to print patterns in full size on sheets of any format? Category: F.A.Q.
- Pattern of a dress for a babydoll girl Category: Dress patterns for free
- How to take measurements for sewing Category: Sewing: general questions
- How to sew a skirt without darts and without a pattern: "Tatyanka" Category: How to sew...?
- How to learn to sew from scratch at home for free? Category: F.A.Q.
- Skirt with a belt - how to sew a belt to a skirt and processing the belt when sewing a skirt for beginners Category: Waist section processing with and without belt
- How to choose a pattern size? Do Olkhovskaya patterns require a fit? Category: F.A.Q.
- Do-it-yourself parsley, Cossack and Gnome according to free patterns by Vera Olkhovskaya Category: How to sew a New Year's costume and costumes for the holidays with your own hands
New lessons and reviews
-
I sewed a boho trapeze dress size 42 according to your pattern
Category: Patterns - photos and reviews from users

-
I made two dresses with this pattern.
Category: Patterns - photos and reviews from users

-
Thanks for the fast order processing.
Category: Patterns - photos and reviews from users

-
When sewing, I slightly deepened the front neck
Category: Patterns - photos and reviews from users
