Size charts What is the height of the pattern Payment methods Ask a question Reviews
PDF pattern for printing on a printer or plotter in full size for cape sizes from 40 to 62.

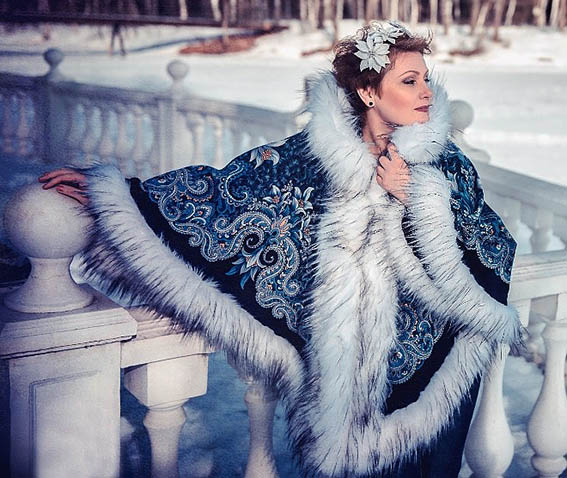
How to sew a New Year's cape Pavloposadsky with a hood with your own hands according to the finished pattern
Contents of the instruction:
- Description of the pattern and style of the cape.
- What to sew a New Year's cape from.
- How to download and print an electronic cape pattern
- Features of the pattern of the cape of the New Year's Pavloposadsky do-it-yourself.
- How to sew a cape with a hood according to the finished pattern step by step.
Buy and download a ready-made cape pattern
Description of the pattern and style of the cape
Electronic cape pattern.
Sizes: 40-62 (buyer gets ALL sizes!).
File Format: PDF, patterns Made in full size without seam allowances.
After paying for the order, you will receive links to downloading two cape pattern files:
- PDF file adapted for printing patterns on sheets of A4 paper from any program on any device.
- PDF file for printing on sheets of any size from A0 to A4 on a printer or plotter using Adobe Reader.
The sewing difficulty level is medium, so a pattern for beginners who want to learn how to sew clothes from scratch at home is not recommended.
The style is suitable for almost all figures. The exception is only very full ladies, since they need cut sizes that exceed the size of the largest Pavloposad shawl.
 The set of patterns for a cape from a Pavloposad shawl includes (picture 1):
- patterns "shelves" and "backs" on which cut out the neck and the edge of the side;
- hood pattern.
What to sew a New Year's cape from
Not only Pavloposad shawls are suitable for sewing, but also soft coat fabrics.
Lining
Lining fabric is better to choose not from ordinary lining fabrics. Since the product will not have any fixation on the shoulders, it is better to take a non-slippery fabric. For example, cotton material such as calico, baize or footer without fleece.
insulation
Any soft and not too thick warming material is suitable as a heater. For example, batting or woolpon.
A good option would be a heater that can be "put" in the product without lining. For example, fleece or footer with fleece.
But the best option is a down scarf. You can use old scarves that have lost their appearance. They are easy to combine into one insulating pad.
Calculation of fabric consumption for cape
So how much fabric really.
You will need a Pavloposad shawl (a square piece or piece of fabric) measuring 148 by 148 cm.
The consumption of lining fabric and insulating pad is 200 cm with a width of 140 cm, since you will have to cut out larger parts than a scarf.
The consumption of a fleece footer with a width of 180 cm will be 180 cm.
For the edge, it is better to use strips of fur on the braid. Approximate consumption, if no rounding is done 680 - 685 cm.
How to download and print an electronic cape pattern
How to choose size patterns without taking measurements and using size charts
How to print a pattern at home in full size on A4 sheets
Download PDF patterns at no extra charge.
Buy and download this cape pattern
Features of the pattern of the cape of the New Year's Pavloposadsky do-it-yourself
 Cutting is performed on a scarf folded diagonally (picture 2).
You need to fold along the middle line of the pattern, facing inward, place the diagonal fold of the scarf parallel to the edge of the cutting table.
Then, at the fold, you should find the center of the scarf and lay out the “shelves” and “backs” patterns on the scarf, taking into account the center point.
The middle line of the "back" should coincide with the fold of the scarf (diagonal).
Half skid (middle line of the shelf) - extended to the edge of the scarf. We do not add an allowance for the fastener - we will make hinged loops. That is, the sides will turn out end-to-end.
The hood pattern fits into a lunge. If it doesn’t fit, move the “shelf-back” patterns a little from the center, but along the diagonal line, which in this layout replaces the shared one.
The seam allowance for the hood is 1 cm along the seam and along the line of the face frame. No allowance is added along the stitching line.
No allowance is added to the neck, both in the cape and in the hood.
Do you need a shoulder tuck? A tuck is needed if you want to attach a shoulder pad. If the cape is without a shoulder pad, then the “shelves” and “back” patterns can be glued end-to-end along the shoulder seam and the already combined pattern can be used when cutting.
 We cut out the lining according to the details of the cut (picture 3), which have already been cut out - along the cape and hood.
The fabric is folded in half, facing inward, the edges are combined and placed parallel to the edge of the cutting table.
We lay the cape on a lining with an indent from the cuts of 3 cm. A fragment that does not go wide can be covered with plastic wrap and circled, taking into account the double allowance for an additional stitch - 2 cm. If you have enough experience, then you don’t need to make a pattern. Please note that the neck also does not need to be cut yet.
We also cut out the details of the lining for the hood according to the details of the cut, adding 1,5 - 2 cm to the existing allowances.
Then, we sew the lining of the lining, iron the seam and you can cut the insulation.
The insulating lining is cut out according to the details of the cut of the lining. You don't need to add allowances. Fragments of insulation, if it is made of batting or sherstepon, are best joined end-to-end with oblique stitches so as not to add thickening. Shared direction does not matter.
If the lining and insulation are cut out from a footer or fleece, then you do not need to add "around" 3 cm, 1 cm is enough.
How to sew a cape with a hood according to the finished pattern step by step
Sewing a cape with a hood can be difficult for beginners, as you need to connect 2 - 3 layers of fabric together so that none of them are stretched or planted.
- We start by laying out the insulation of the cape and hood details on the table or on the floor and processing the pockets on the lining.
- See how to process lined pockets.
 Then, on top, we lay carefully ironed details of the lining and we baste the lining on the insulation with large (5 - 7 cm) oblique stitches or cleave with tailor's pins (picture 4).
- After that, it is desirable to quilt the lining, but very rarely, so as not to give it unnecessary rigidity, just a few lines (picture 4).
- It is not necessary to quilt the details of the hood, since the line connecting the two halves will be enough. After grinding the hood lining, the insulation on the seams and on the tuck can be cut off, leaving a couple of millimeters, and the seam should be carefully ironed.
- Now you can cut out the neck with a tuck and on the “lining” according to the cape detail from the scarf. And, having processed the tuck, cut off the insulation and carefully iron it.
- To the "top" of the naki
 to attach the epaulette shoulder pad. By the way, it is better to make a shoulder pad from a padding polyester, it is not necessary to cover it with a cloth.
 - Download free epaulette shoulder pad pattern You can visit Vera Olkhovskaya's website.
- Stitching the hood is better with preliminary stitching. In this case, it is advisable not to forget the loop.
- When the hood is stitched in and the processing of the "lining" and "top" is completely finished, you can connect the "top" to the "lining" and cut off the excess.
- You need to connect first at the seams, and then with a machine stitch along the edge of the “top”, stepping back from the cut 0,5 - 0,7 cm. The cut should be edged with an oblique trim in the color of the scarf.
- See how to make bias tape at home.
- At the final stage, we sew stripes of fur on the braid.
- And we sew on hinged loops (look in specialized stores like "everything for sewing") with buttons. Ready!


Sewing masters, of course, can come up with more complex ways to finish the edge of the cape and puff.
See also a pattern of a vest with an edge from a Pavloposad shawl plus a detailed description of the cut and sewing of this model.
Download this pattern pdf:
Pattern "cape with a Pavloposadsky hood"
$1.00 (40 hryvnia)
Bank cards of the Russian Federation are not accepted for payment!
Size charts What is the height of the pattern Payment methods Ask a question Reviews
Vera Olkhovskaya in social networks:

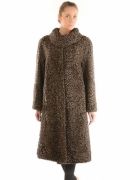
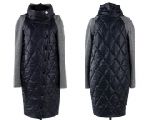
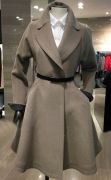
More patterns of models of a similar style or cut

American Snow Maiden pattern $2.00 |

Fur coat pattern of the Snow Maiden $3.00 |

Little Red Riding Hood costume for adults $3.00 |

Pattern "vest with edging" $1.80 |


-
Any pattern for free for a review of a previously made order
More...
Lifetime promotion for buyers of patterns!

Leave a review about my store of patterns for an order that you made before, and you will receive any paid pattern of your choice Free!
Catalog:
New patterns on the site


Most readable articles
- How to print patterns in full size on sheets of any format? Category: F.A.Q.
- Pattern of a dress for a babydoll girl Category: Dress patterns for free
- How to take measurements for sewing Category: Sewing: general questions
- How to sew a skirt without darts and without a pattern: "Tatyanka" Category: How to sew...?
- How to learn to sew from scratch at home for free? Category: F.A.Q.
- Skirt with a belt - how to sew a belt to a skirt and processing the belt when sewing a skirt for beginners Category: Waist section processing with and without belt
- How to choose a pattern size? Do Olkhovskaya patterns require a fit? Category: F.A.Q.
- Do-it-yourself parsley, Cossack and Gnome according to free patterns by Vera Olkhovskaya Category: How to sew a New Year's costume and costumes for the holidays with your own hands
New lessons and reviews
-
I sewed a boho trapeze dress size 42 according to your pattern
Category: Patterns - photos and reviews from users

-
I made two dresses with this pattern.
Category: Patterns - photos and reviews from users

-
Thanks for the fast order processing.
Category: Patterns - photos and reviews from users

-
When sewing, I slightly deepened the front neck
Category: Patterns - photos and reviews from users
