Size charts What is the height of the pattern Payment methods Ask a question Reviews

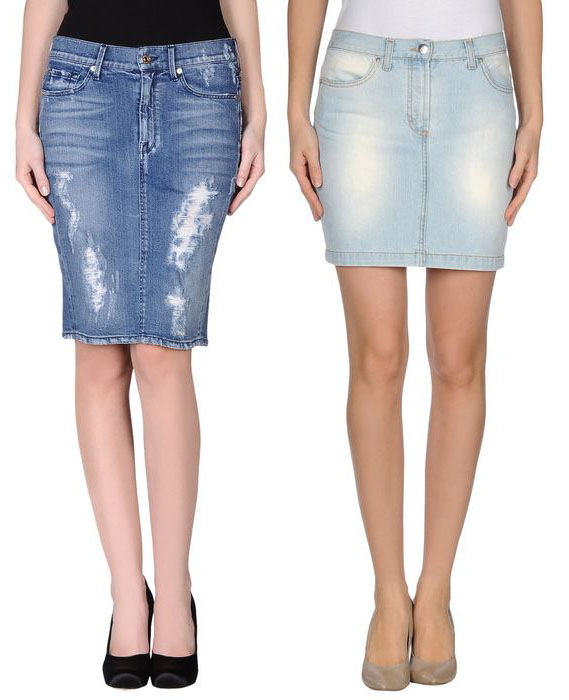
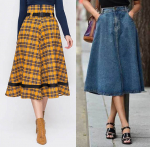
How to sew a pencil skirt from jeans with your own hands according to a pattern for beginners step by step
Read this guide:
- Description of the skirt pattern set.
- How to download and print patterns.
- Step by step workflow for beginners:
Download jeans pencil skirt pattern
Description of the skirt pattern set
 Electronic pattern of a jeans pencil skirt for women's sizes from 40 to 62.
Sizes: 40-52 and 52-62 (the buyer receives one of the gradations of sizes to choose from).
The file format of the electronic skirt pattern:
PDF for printing with your own hands on a printer, patterns are made in full size with allowances for fasteners and slots, but without allowances for seams.
After paying for the order, you will receive links to download two files patterns of a skirt of the gradation of the sizes chosen by you:
- PDF file A4, adapted for printing patterns on sheets of A4 paper in any program on any device, including mobile phones.
- Multi-format PDF file for printing on sheets of any size from A0 to A4 on a printer or plotter using Adobe Reader.
Sewing difficulty level: simple - a pattern for beginners who have already sewn a couple of products.
This skirt model is ideal for the training period, as it contains two types of simple pockets, a trouser-type closure and a vent.
A set of patterns for sewing a denim pencil skirt
-
 Pattern of the back half of the skirt (ZP).
 - Pattern of the front half of the skirt (PP).
- Coquette ZP skirts.
- Patch pocket for ZP.
- Patterns of the details of the pocket "cut-off barrel" - burlap-valance and burlap-turning.

Drawing with patterns of details for a pencil skirt
Belt patterns are not included in the set of patterns, as these are strips of fabric, but the cutting of the belt is described in detail and illustrated below.
For sewing this pencil skirt, of course, suitable various denim and linen fabrics, as well as any fabrics with a similar texture and density. In addition, velveteen, thick woolen and suit fabrics can be recommended.
How to download and print the patterns of this skirt with your own hands
How to choose size patterns without taking measurements and using size charts
How to print a pattern at home in full size on A4 sheets
How to assemble a pattern, consisting of several large sheets, watch the video master class
My Free Life Size Patterns samples of printing and sewing on electronic patterns.
Download this pencil skirt pattern for beginners
A step-by-step sequence of work for beginners on a do-it-yourself skirt pattern
Featured on this page pencil skirt does not belong to the latest fashion, but sewn from printed stretch jeans or good woolen fabric, it can perfectly complement your everyday wardrobe. And it is this model that consists of those elements that a novice couturier, who has already tried his hand at an ordinary straight skirt.
General recommendations for beginners on cutting skirts
This model can have any length and you are free to refuse some operations and finishing lines that complicate the style, as well as choose the location of the slots (in front or behind).
Please note: for the RFP and for the PP of the skirt, allowances for the slot are given. You need to select one of them, the other is to cut.
If necessary shorten the pattern, just lay the crease across it. For lengthening - extend down the lines of the side and middle cuts.
The belt template is not shown, as it is a rectangle, which is marked on the fabric during the cutting process. In this case, the length of the belt, which will consist in this case of two parts, is as follows
St (half waist) + 10 cm for processing
Width
Two widths finished + 2 cm for processing
Seam allowances for skirts
 When the patterns are printed and cut along the lines of your size, you can discuss technological allowances (picture 2).
- Side cuts and the middle seam of the PP (it is also a semi-skid), as well as side cuts of the details of the PP pocket - 1 cm.
- Bottom - 2,5 - 3 cm.
- The average seam of the RFP and the yoke is 3 cm to correct the product during the fitting.
- The waist sections of the PP, the details of the PP pockets and the yoke are cut out beyond the stroke line.
- For the RFP pocket: at the entrance - 2,5 cm, the remaining sections - 1 - 1,5 cm.
- PP pocket details - 1 cm each, except for the waist cut, the last one - for the stroke line.
Do-it-yourself fabric layout for a pencil skirt pattern

At this stage, it is very important not only to place the parts in a certain fractional direction, but also to save fabric as much as possible. Please note: RFP and PP are placed strictly parallel to the edge. That is, the share coincides with the middle seam of the RFP and the semi-skid (the middle seam of the PP).
The width of the layout (from the top edge to the fold) is equal to the width of these two parts. Belt - cut across. When placing the yoke, it must be taken into account that none of its cuts is on the shared thread, that is, whatever you like, just not parallel to the edges.
On the remainder we lay out the details of the pockets. This layout is suitable for plain dyed and printed fabrics. The burlap-turning can be cut out of a thin lining fabric, this will help to make the entrance to the PP pocket thinner.
Another important point: on the burlap-valance, on both parts, it is necessary to draw a pocket entry line. It is advisable to do this very accurately and lay a thread along the line (“snares” or cushioning seam).
Dubbing in a pencil skirt
When the details are cut out, we proceed to dubbing. Half of the belt is necessarily duplicated along its entire length - the dubbing area is shaded.
 The dubbing of the RFP pocket is shown in more detail on picture 4. Please note: You are advised to make an exact pocket template from cardboard (figure 4a). It will be needed both during processing and for dubbing (figure 4b). In this case, the partial thread of the backup pad should be parallel to the pocket entrance.
Do I need to duplicate the allowances for the slots and fasteners? It is difficult to answer unambiguously. If the fabric stretches in the shared direction - it is necessary, if it stretches only across - it’s not worth it, since dubbing will make the denim fastener and slot coarser.
Step by step after duplication is completed
- When the duplication process is completed, we overcast several sections: one side of the RFP pocket from the entrance side, one (long duplicated) side of both parts of the belt. We overcast from the front side.
- Let's start processing the PP pocket.
Detailed denim pocket sewing description
Video master class on sewing a denim pocket "cut-off barrel" with rounded entry line - When the PP pockets are ready, we proceed to the processing of the middle seam and fastener.
- We start by sweeping the sections of the fastener and slots, and we grind the middle segment, starting and ending the line with a bartack, and iron all the allowances to the right.
- If you decide to duplicate the allowances for the fastener and slot, duplicate the lower ones, that is, the allowances of the right shelf completely, and the upper ones, the wrong side of which you can see in strips of 1 cm from the edge.
- After that, the middle seam of the PP with all its protrusions and bends can be overcast (a cut of each half separately) and ironed again.
Video sewing master class for beginners - trouser fastening processing by simplified technology - Having finished with the fastener, set aside the PP and collect the RFP: grind the yoke with the RFP, overcast and iron down the seam allowances.
- Iron the pockets of the RFP along the line of the entrance to the pocket and, placing a cardboard template on the inside of each of them, carefully iron the raw allowances up. After completing the ironing operation, lay the pocket blanks on the RFP and baste them with large diagonal stitches, observing symmetry. It is better to adjust pockets after trying on.
See video tutorial on patch pockets - Having prepared the pockets of the RFP. Back to PP.
- Then we overcast, grind and iron the side seams of the skirt so that the burlap enters the seam.
- We iron the duplicated parts of the belt in half along ... Further processing is exactly the same as for the "denim" belt of trousers. Please note that the belt for this skirt is possible, as well as for trousers from two halves. This will make it easier to fit the skirt to the figure, especially for those with a large lumbar deflection and protruding buttocks.
See video master class on sewing a denim belt
And article about sewing a belt in custom-tailored denim - In the next step, you will have to unpick the upper part of the basting of the middle seam of the RFP and first bast the wrong (duplicate) half of the belt to the skirt. We lay the line from the face either along the belt, as in jeans, or between the belt and the skirt to hide the line. After that, we iron the belt, overcast the middle seam of the RFP and grind it according to the marks obtained during the fitting. It is very important that the yoke and belt match and do not warp the product.
- Then, we overcast the cut of the bottom and proceed to the processing of the slots.
Watch and read how to trim a slit in a straight skirt - The middle seam should already be ready, that is, a stitch, its allowances are swept over and ironed to the right.
- After processing the corners, the slots, the bottom into a hem with an open cut, that is, a swept cut, is folded over once, tucked in and hemmed or stitched with a finishing line.
Download this pattern pdf:
Pattern for beginners jeans pencil skirt
$1.60 (64 hryvnia)
Bank cards of the Russian Federation are not accepted for payment!
Size charts What is the height of the pattern Payment methods Ask a question Reviews
Vera Olkhovskaya in social networks:

More patterns of models of a similar style or cut
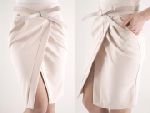
Wrap skirt pattern $1.50 |

Pattern of a skirt with a one-piece belt $1.00 |

Skirt pattern for beginners with an elastic band $1.00 |
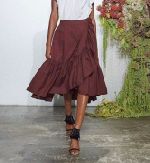
Tulip skirt pattern with pockets $1.50 |
See similar clothing patterns and how to sew on them


-
Any pattern for free for a review of a previously made order
More...
Lifetime promotion for buyers of patterns!

Leave a review about my store of patterns for an order that you made before, and you will receive any paid pattern of your choice Free!
Catalog:
New patterns on the site


Most readable articles
- How to print patterns in full size on sheets of any format? Category: F.A.Q.
- Pattern of a dress for a babydoll girl Category: Dress patterns for free
- How to take measurements for sewing Category: Sewing: general questions
- How to sew a skirt without darts and without a pattern: "Tatyanka" Category: How to sew...?
- How to learn to sew from scratch at home for free? Category: F.A.Q.
- Skirt with a belt - how to sew a belt to a skirt and processing the belt when sewing a skirt for beginners Category: Waist section processing with and without belt
- How to choose a pattern size? Do Olkhovskaya patterns require a fit? Category: F.A.Q.
- Do-it-yourself parsley, Cossack and Gnome according to free patterns by Vera Olkhovskaya Category: How to sew a New Year's costume and costumes for the holidays with your own hands
New lessons and reviews
-
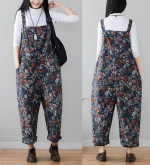
I sewed a boho trapeze dress size 42 according to your pattern
Category: Patterns - photos and reviews from users

-
I made two dresses with this pattern.
Category: Patterns - photos and reviews from users

-
Thanks for the fast order processing.
Category: Patterns - photos and reviews from users

-
When sewing, I slightly deepened the front neck
Category: Patterns - photos and reviews from users
