Vera Olkhovskaya
As you guessed, there remains only the basis for full owners of a voluminous protruding belly, which protrudes more than the chest. Unfortunately, earlier figures of this type, which received the code name "apple", did not exist for fashion designers. The only exception was Alla Pugacheva. For her, Vyacheslav Zaitsev came up with hoodies, which over time became unchanged and, perhaps, even the main detail of the prima donna's image.
This foundation is suitable for ladies with any volume and shape of the chest, with any type of posture.
Features of the drawing of such a base pattern
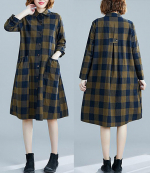
It can be used as a ready-made dress pattern or as a coat pattern, of course, with the necessary additions. This base is a great alternative to the "sheath" dress for "apples".
Read more about the types of figures and changes in the formulas of the basics possible in previous chapters.
The peculiarity of this drawing is that the volume of the hips is not taken into account in it. Unfortunately, this base pattern is not very suitable for patternless cutting, since it is difficult to calculate the width of the shelf and achieve its economical placement on a piece of fabric.
The middle seam of the back is built in accordance with the characteristics of the lumbar deflection and the shape of the buttocks (Fig. 21) ...
Stepping back from the bottom horizontal cut of the paper on 3 см to lengthen the shelf, draw a straight line parallel to it - the bottom line. Lay up from her du and draw a waistline. The starting line is located up from the waistline at a distance Ds. Barrel level - up from the waist step back on
dB minus 2 cm
Hip line - down from the waist to 18 см.
Rostock. On the original horizontal from the center line of the back, measure
1/3Ssh + 0,5cm
Then from the same point down
1/3 sprout width
Reduce the resulting points smoothly. The shoulder is built using notches made with two radii.
R1 \uXNUMXd Dp + vyt
The "leg" of an imaginary compass must be placed at the lateral point of the sprout and a small arc drawn.
R2 = Vpk + 0,5 cm
 Place the “compass leg” at the intersection of the horizontal waist and the vertical of the middle seam of the back, draw an arc so that it intersects with the first arc.
After that, connect the lateral point of the sprout and the point of intersection of the arcs (shoulder point).
Now lengthen the germ curve by 0,5 см, lifting up its side point, and build a shoulder tuck.
The width of the back at the level of the barrel to the corner of the armhole (in the figure it is darkened)
W +1 cm
The width of the back at the level of the barrel and hips from the middle to the side seam is the same
1/2 (Cr + Pg) minus 3 cmWhere Pg = 4 cm;
Armhole angle bisector - up to 4 cm.
The deflection of the side seam is 1 см and it is performed not to create a fit, but to ensure that the seam lies better.
The waist tuck is needed only if the lumbar deflection is very large or the buttocks protrude strongly. To build it, the waist segment of the back should be divided in half, and draw a vertical line through the resulting point. The tuck solution is distributed evenly on both sides of the last vertical. As for the lower top of the tuck, it is recommended to deviate it towards the side seam on 0,5-1 cm.
Shelves.
Extend the horizontal lines of the waist, hips and bottom. From the waist up, set aside dpt and draw the original horizontal for the shelf, and from it, measure down Wg and draw a horizontal line. Find the center of the bulge of the chest on the last one, stepping back from the half-skid at a distance rcg.
The armhole level, as before, is determined using the table to reduce the armholes of the shelves. Measure along the middle vertical of the backrest the distance from the sprout to the level of the barrel (in the drawing this segment is indicated by a curly bracket) and subtract the corresponding tabular value from it. Set the result down from the original horizontal shelf.
The width of the neck in most cases is increased in comparison with the sprout by 0,5-1 cm, especially if the product has a closure in the center or with a V-neck.
1/3Ssh + 1 or 1,5 см
The width of the shelf at the levels of the chest and hips, as mentioned earlier, is the same
1/2(Sg + Pg) + 3 cm
Draw an auxiliary vertical of the side seam. In the drawing, it is shown by a dotted line.
To find the top of the armhole angle, set aside from the half-skid
Shg1 + 1 or 1,5 см,
from the obtained point, restore the perpendicular height 5 см. Now, to build an armhole, one more auxiliary point is missing, which is separated from the highest point of the side cut by 1 см to the right and to 1 см up. Curve the armhole.
Side tuck for the chest: the solution is equal to the difference in the lengths of the side segments of the front and back, measured from the highest point of the side seam to the level of the waist. Set aside half of the solution of the tuck up and down the vertical side seam of the shelf from the level of the height of the chest.
Build tuck lines and align them with each other and make a waist deflection in 1 см. After that, the patterns can be cut.
The most interesting moment has come: the rotation of the darkened part of the shelf relative to the center of the bulge of the chest. To do this, cut the pattern from the bottom to the center of the bulge of the chest. The angle of rotation can be different, but after it the shelf must meet two conditions:
Condition 1 - the turn is sufficient if the side tuck is halved.
Condition 2 – the rotation is sufficient if the total volume of the shelf and the back (including the rotation) exceeds the largest of the volumes of the figure by the amount of the desired increase.
For example, the St = 80 cm, Sat = 75 cm. So you need to measure the back pattern at the waist level without taking into account the deflection of the middle seam and the waist tuck, then measure the shelf pattern at the waist level before the turn is made. Add up the values. Let's say the amount is 76 см, but you need St + Friwhich is equal 80 см + 6 cm. Thus not enough 10 cm, then the angle of rotation should be such that the arc measured at the level of the waist is equal to 10 cm.
It is also possible to completely close the tuck, if it is necessary for the style or if the chest is very small.
Completion of the drawing. When the turn is completed, the parts of the pattern are fixed in this position and the shelf is elongated, it remains only to say about the need to shorten the side tuck by 2 - 2,5 cm. Although, you can do this directly when cutting.
Ready-made patterns of shirt dresses for women