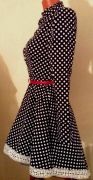
Sewing lessons from Vera Olkhovskaya
In this video master class on sewing a dress, you will see the use of new sewing technologies that are not yet very common.
Beginning couturiers will, of course, get the answer to the question of how to sew a dress and see very simple sewing techniques that professional tailors call a unified sewing technology.
It is important that this video shows the entire sewing process from start to finish.
Most of the sewing operations shown in the video tutorial can be applied in mass sewing, but some are only suitable for individual sewing.
The pattern of this dress was developed from a photograph from a book by Japanese designer Nakamichi Tomoko.
 You have already seen the development of patterns and cutting of this dress and probably immediately realized that it is almost impossible to make marks on this fabric.
Watch the video master class on the development of patterns and modeling of this model
And also video tutorial on cutting
I start by sewing darts on the back and on the sleeve.
When grinding, I focus only on the notches I made when cutting, and on the tops of the tuck, which I mark with an ordinary pin.
 I fix the beginning and end of the tuck.
I sweep the warehouses on the shelf, also focusing on the notches and the top.
And a one-piece collar - I grind.
Then I iron out all the details.
 Warehouses on the shelf turned out pretty and they overlap each other.
I cut them so that they are butt.
Then I trim the shoulder and side sections of the front and back with an oblique trim.
For binding, I use my favorite adjustable home sewing machine binder and a special stitch (see photo) recommended by my sewing machine manufacturer.
See also the video master class on sewing with a binder "How to replace the overlock"
When the shoulder and side cuts are edged, I return to processing the warehouse. I edge the sections and, so that the warehouses do not deform in the toe, I glue them with thermoplastic adhesive tape.
 Then I make a tie that imitates a tie knot.
After that, you can sweep and iron the side and shoulder sections for fitting, as well as
accept an overhead zipper.
The end of the zipper is cut off, edged with the same braid as the cuts and folded into a “corner”.
Please note: it is better to baste the zipper by turning the bodice inside out so as not to go over the teeth.
Stitches 1 cm.
And in mass production, the zipper should be stitched before grinding the shoulder and side seams.
After the zipper, we pin it with a pin or we tack on the shoulder pads.
I take ordinary foam rubber, which are sold in every sewing store.
After that, the bodice can be tried on.
When trying on, you need to clarify the line connecting the bodice with the skirt, tying the figure with a linen elastic band.
In other words, determine the length of the bodice that is suitable for the figure.
In addition, if necessary, cut the armhole.
Watch and read how to cut armholes
Well, after trying and you can start processing a one-piece rack.
To do this, fold the bodice in half and pin it together.
If the edge is uneven, it can be ground, that is, trimmed.
Then, put the bodice on the doubler folded in half and circle the rack, mark where the shelf is and where the back is.
And cut out the dubbing details.
Stick the dubbing onto the fabric and cut it out.
Turn over the cut, which will fly away.
And turning the collar is very easy.
Fold the facing face to face with the shelf, chop off the middle with a pin and lay the first line.
Then cut off all allowances that give thickening and are located above the line.
It remains only to make notches on the facing so that it can easily lie on the inside of the collar.
And now, attention: the product is face up, the seams are folded towards the facing and a line is laid along the facing, which will secure these seams.
It remains only to make a notch with large oblique stitches, iron and hem the edged cut.
The pillow of the tie, if you want, can be made more convex by placing a piece of batting under it.
We start by finding the highest point of the eyelet by folding the sleeve in half along the seam.
Then we put the sleeve into the armhole, aligning the shoulder seam and the highest point of the eyelet.
We chop off the sleeve and armhole with pins, distributing the fit of the sleeve.
Attention! The eyelet should be longer than the armhole!
All that sewing-dummies call superfluous is landing!
When the sleeve and armhole with stab, landing distributed, you can vmyotivat.
The stitching line should be at a distance of 1 cm from the cuts.
The stitch length is also about 1cm.
After a couple of ordinary stitches, we make a bartack - two stitches in one place.
And we sew the sleeves in two lines, slightly stretching so that they do not tear in the sock. The distance between stitching lines is 1 mm, while the stitches of the basting line should be closer to the cut.
We edge the cuts of the armhole, but we better overcast it on an overlock.
Dress patterns