 In the article, read how to build a basic pattern with a tuck from the side seam with your own hands and download ready-made patterns built on such a basis.
This lesson on the cutting technique is quite simple and can be recommended for beginner couturiers who have already learned how to take measurements and remember their letter designations.
! For beginners: For an explanation of all abbreviations and names of measurements, see the article with a video lesson at the link below.
Don't forget to use measuring table.
Download ready-made dress patterns on this basis
To prevent the pattern of the base of the back from overlapping with the pattern of the base of the shelf, check the width of the paper sheet. It should be no less than the width of the back and shelves combined:
Sat + 4cm
Back of base
 We start with vertical and horizontal lines.
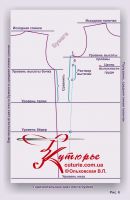
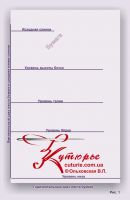 The middle line (vertical) of the backrest will be the left cut of the sheet of paper (Fig. 1).
Then we draw the original (first, initial, top) line, departing from the lower horizontal cut of the sheet
DI + 3 cm
Of course, this horizontal line and the subsequent ones must be strictly parallel to each other and strictly perpendicular to the middle line of the back.
From the original line down we measure Ds and draw a waist line.
From the waist up
D barrel minus 1 cm
This is for the barrel height level.
From the waist down 18 см - the level of the hips.
To determine the bottom line from the original down - Di or from the waist down du, depending on which measurement you prefer to take.
Finished with horizontal lines.
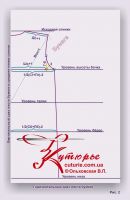 Further, at the level of the barrel, set aside the width of the back (Fig. 2):
ws + 1 cm,
for kinky figures -
ws + 1,5 cm
In the same place, measure the width of the back to the side seam:
1/2(Cr + 4) minus 2 cm
Sprout width - according to the original to the right
1/3Ssh + 0,5cm
The height of the sprout - down the middle line of the back:
1/3 sprout width
Shoulder cut. We need to draw two intersecting arcs.
The first arc - from the lateral point of the germ with radius
Dp + w
(in many cases, a tuck is not needed and you can get by with a fit 1 см)
The second arc - from the midpoint along the waist with a radius VPK. If there is a shoulder pad, add more 1 см, that is, the radius will be
Vpk + 1 cm
From the back width point (red cross) - perpendicular 7-8 see.
And from the same point, we will consider it the top of the armhole angle, along the bisector - 3 см.
Set aside according to the level of the hips
1/2(Sat + Pb) minus 2cm
Draw a side cut with a straight line.
Shelves
If you are building the base of the shelf on the same sheet, extend the horizontal lines of the waist, hips and bottom (Fig. 3). If on a different sheet, copy the horizontals for the shelf pattern onto a new sheet.
Then take your measurement from waist up. dpt and draw another original horizontal line for the shelf.
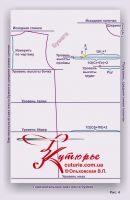 From the original line of the shelf down, measure the measurement Wg and draw a chest height line, then again from the original down - an armhole height line.
To find the height of the armhole of the shelf, you need to measure the distance from the midpoint of the sprout to the level of the barrel according to the drawing of the back. The resulting distance should be reduced in accordance with armhole reduction table.
And set aside the already reduced value, as was said, down from the original line of the shelf.
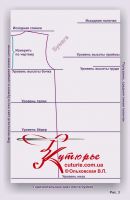
The next stage, which can be conditionally called “width limitation”, is shown in Fig. 4. The most important vertical of the shelf pattern is a semi-skid - this vertical corresponds to the midline of the human body, passing through the jugular cavity and the navel.
We will consider the right vertical cut of a paper sheet as a half-skid.
We start from the base line of the shelf - we measure the width of the neck along it from the half-skid:
Neck Width = Stem Width
Neck Depth = Neck Width + 1cm
The depth of the neck is measured, you guessed it, down the half-skid.
We connect the obtained points of the neck with a smooth curve.
At the level of the height of the chest from the half-skid, measure rcg and mark the center of the bulge of the chest - we will need this point to build the chest tuck.
From the half-skid at the level of the armhole, set aside the width of the chest:
Shg2+ 0,5 or 1 см.
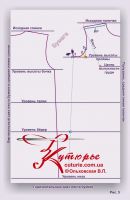 From the resulting point upward perpendicular segment 4 - 5 cm. Its top is one of the points of the armhole and you can immediately make a bisector from the corner of the armhole (shaded in yellow) - 2 - 2,5 cm. We'll deal with the layout later.
And again, from the half-skid at the level of the armhole - set aside the width of the shelf to the side seam:
1/2(Cr + Pb) + 2 cm
Measure at hip level
1/2(Sat + Pb) + 2 cm
Now, the shoulder section (Fig. 5).
We find the shoulder point at the intersection of two arcs:
The first arc - is performed from the side point of the neck with a radius Dp;
 The second - from the point of the bulge of the chest with a radius npp + 1 cm for shoulder pad.
 We connect the resulting shoulder point with the side point of the neck already existing on the baseline.
The armhole will be made according to the existing points of the shoulder, "5" and "2". The last point of the armhole should be shifted up and to a half-skid by 1 см.
Connect the "unit" to the point marked at the level of the hips. This will give you a preliminary side cut line, without bust darts yet.
Construction of a "side" tuck (Fig. 6).
To determine the solution of the tuck, we compare the length of the barrel of the back and the length of the barrel of the shelf, measuring them according to the drawing.
We start the top line of the tuck by retreating down the side cut from the “one” to 5 см.
Next we measure 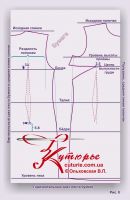 extract solution.
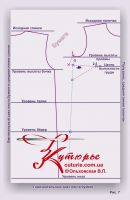
The top of the tuck (fig. 7) should not reach the center of the bulge of the chest on 2,5 см - mark the point "2,5" and connect it with the points already on the side cut.
We equalize the sides of the tuck along the longer side and build the missing section of the side seam (red dotted line).
It remains only to draw all the lines smoothly, lengthen the half-skid by 1 - 1,5 cm and add darts (see below and in Fig. 8).
If the tuck is too big, then this base will not work for you.
See, how to build a base pattern for large breasts - a lesson on the technique of a patternless cut from Vera Olkhovskaya
So, the tucks and deflections of the side seams along the waist (Fig. 8) are calculated in the same way as for basic patterns with a chest tuck from the shoulder section
But, of course, the waist tuck of the shelf should be shifted from the center of the bulge of the chest to 2,5 см to the side seam. This way the waist tuck will be under the top of the bust tuck.
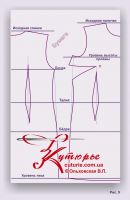
The finished pattern base with a side tuck for the chest is shown in fig. 9.
Ready-made patterns of dresses on such a basis with a tuck from the side seam
Dress pattern for full - trapeze angle with an average seam
Ready-made patterns for sizes from 52 to 64 and a dress pattern with a trapeze angle with an average seam in sizes from 40 to 52. PDF files for printing and detailed step-by-step instructions for beginners on how to sew a dress of this style.
Download a ready-made pattern of a trapeze dress for sizes from 40 to 64
Ready-made dress pattern a-line cage for sizes 40 - 64
A-line dress pattern "Cage" in sizes from 40 to 52 and a-line dress for full size patterns from 52 to 64. Cutting and sewing is easy for beginners from plain fabrics and medium from fabrics in a cage. PDF files for printing and assembling patterns with your own hands with instructions on how to sew.
Download a ready-made dress pattern trapezoid cage
Pattern of a detachable Tatyanka dress with a high cuff
Sizes: 40-52 and 52-62. This style of dress is suitable not only for slender girls, but also for full ones. And thanks to the detachable bodice, the pattern is suitable for any height. The Tatyanka skirt solves another problem - the mismatch between the size of the hips and the size of the bodice and fits perfectly on a figure that combines two sizes.
Download a ready-made dress pattern with a detachable bodice
Ready-made dress pattern with a double bodice
Sizes: 42-52. The style of this dress is suitable for slender figures of any height, as the length of the bodice is adjustable during fitting. Sewing difficulty level is high. Pattern for beginners is NOT RECOMMENDED.
Download double bodice dress pattern
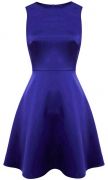
Violet dress on a pattern basis with a tuck from the side seam
Sizes: 42-52 and 52-62. Sewing difficulty level: easy.



 Join my community on Viber...


