Size charts What is the height of the pattern Payment methods Ask a question Reviews
Electronic pattern for printing in full size on a home printer or large-format plotter. Can be printed on sheets of paper from A4 to A0. Paperless cutting through the projector is possible.
 Free download Instructions on how to sew a dress pattern
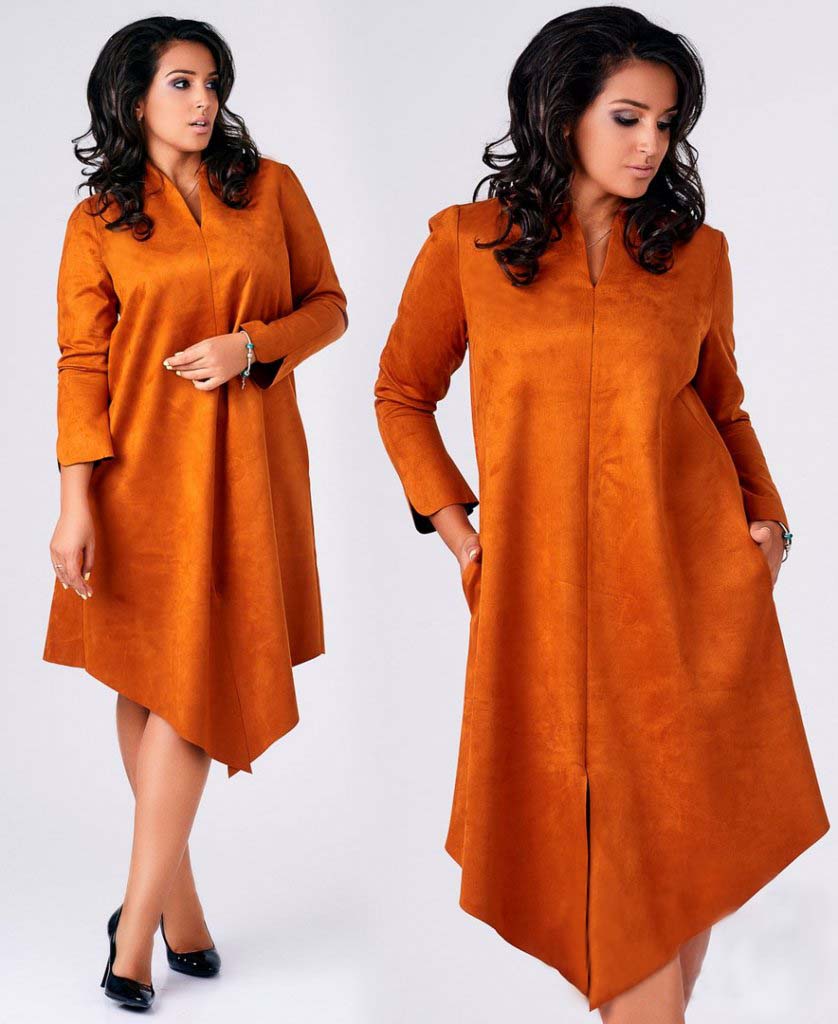
How to sew a dress for full and slender figures - a trapeze with an average seam

Read this pattern instructions:
- Dress style for full and slender, a set of patterns and what to sew.
- How to download, print and assemble dress patterns with your own hands.
- Features of cutting according to the finished pattern with your own hands.
- How to sew a dress of this style quickly and easily for beginners.
Description of patterns, set, style for full and slender figures, fabric
 Sizes: 40-52 and 52-64 (the buyer receives all sizes of the selected gradation)
File format for download in order:
PDF in full size and without seam allowances.
After paying for the order, you will receive links to download two files dress patterns for each size gradation you choose:
- PDF file A4, adapted for printing patterns on sheets of A4 paper in any program on any device, including mobile phones.
- Multi-format PDF file for printing on sheets of any size from A0 to A4 on a printer or plotter using Adobe Reader.
 Sewing difficulty level: from simple to medium - depends on the complexity of the fabric processing.
Set of dress patterns
- A back with an average seam.
- A shelf with an average seam, a one-piece collar and an additional marking of a mouth "under a neck".
- Two-seam sleeve - front half (PP) and back half (ZP) with markings of various lengths.
- Facing (lower collar) for processing the collar.
- Burlap pockets - for a small brush and for a large brush.
The pattern of the facings of the bottom of the sleeve is not included in the kit, as they are cut out according to the same pattern as the sleeve.
Style and fabric consumption
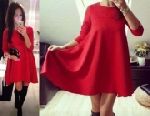
The basis of the dress pattern of this style is a trapezoid with a tuck from the side seam.
This style is suitable for full and slim, but will require the ability to conduct a high-quality fitting in order to correct the collar in accordance with the type of posture.
Home couturiers who are just starting to learn how to cut and sew, as well as happy owners of complex figures, can choose a variation with a neckline or change the shape of the neckline at their own discretion.
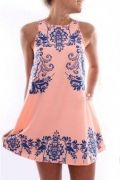
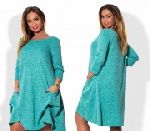
Marking the length of the sleeves from short to full length sleeves will allow you to choose the best option based on the length of the arms and the specific design. A short sleeve will allow you to sew a summer dress with this ready-made pattern with your own hands.
 The same applies to burlap patterns - put your palm on the patterns and choose your option.
In this style, the middle seam of the back is "added" to ensure a better fit of the dress on the figure and to eliminate the effect of "tightening" in the middle of the back.
Fabric consumption, depending on the size, will be from 190 to 250 cm with a width of 140-150 cm.
What to sew a trapeze dress with an average seam and an angle from
 The choice of fabric depends on the design of the couturier. But for sewing this dress, almost any dress fabric that is not too thin and not too thick is suitable.
For quick sewing of a summer dress with your own hands, “cotton”, poplin, linen, sharply fashionable raw silk and “lightweight” denim, which has already become mandatory in the wardrobe, are well suited. Staple and staple-twill can be considered less suitable, and shirting and batiste can be considered unsuitable.
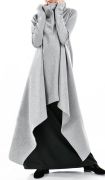
For the demi-season option, you should pay attention not only to woolen dress fabrics, but also to “mixed” ones. For example, silk-wool or silk-linen.
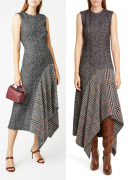
Dresses of this style made of fabrics with large stripes and large cages will be interesting.
Sewing a dress with your own hands from pile fabrics - faux suede or velvet - is recommended only by experienced tailors and requires special ironing tools. At the same time, you should not give preference to stretch velvet or stretch plush.
Knitted stretch fabrics with high extensibility can also be considered unsuitable.
How to download, print and assemble do-it-yourself patterns of this dress
How to print a life size pattern on sheets A4 - A0
How to assemble a pattern with your own hands after printing
How to choose a pattern size without taking measurements and using tables
Features of the cut of the dress for full and slender figures
The choice of size, as usual, is made not by the figure, but by the most successful dress from our own wardrobe. We also choose the length of the sleeve, based on the length of the sleeve of your favorite dress.
Seam allowances
 Side, shoulder, middle seams, bottom - 1 - 1,2 cm each. No allowances are added along the armhole, collar and sprout (neck of the back), departure and cut of the collar. “No allowances added” means that the pattern is traced and cut beyond the stroke line, including the line, which gives an actual allowance of 0,3 - 0,5 cm. This is enough not to distort the design of the model and process the cut.
Pay attention to the fact that in the places where the rounding of the bottom of the sleeve transitions to the seam and the transition to the collar seam, the seam allowances have a peculiarity (figures 2, 3 и 4) is a ledge. The same ledge should be on the facings of the bottom of the sleeve.
The optimal location of the ledge is 3 cm from the edge of the facing (Fig. 2). For a sleeve, the shoulder point (bottom of the seam) should be approximately 6 - 10 cm from the bottom of the sleeve. On the shelf pattern, the ledge point (the highest point of the middle seam of the shelf) is marked.
It is also important to make a notch that cuts off the shoulder seam allowance from the cut of the collar sewn into the sprout (Fig. 2). Without this notch, the shoulder seams and collar cannot be processed, so it must be done very accurately.
How to cut a trapeze dress "corner" with a middle seam
 Cutting itself is not difficult (figures 3 и 4). The fabric is folded in half face to face, the edges should be aligned and placed parallel to the edge of the cutting table.
Jack layout, patterns are arranged in the most economical way.
The share facing should not coincide with the share sleeves and shelves. The fractional burlap of the pocket does not really matter.
First, the facings should be cut out of dublerin without seam allowances, then glued onto the rest of the fabric and only then cut out with the necessary allowances.
On the 3 drawing small size layout is shown, on 4 drawing - large sizes for full.
When cutting, it is necessary to make a notch that cuts off the allowance of the shoulder seam of the shelf (2 drawing) and notches for pockets.
To make notches for pockets, fold the side seams of the front and back on top of each other (all four sections), matching the edges and horizontals of the waist and hips. Step back 5-7 cm from the waist down (the higher the height, the greater the indent) and make the first notch. Attach the pocket burlap to the notch and, stepping back 2 cm less than the length of the cut of the pocket entrance, make the second notch.
The length of the notches for processing pockets in the side seam is 0,9 - 1 cm.
If cutting is performed on pile fabrics (velveteen, velor, suede, velvet, plush), then the pile on ALL details should be in one direction - from bottom to top. Otherwise, the dress will ride up under a coat or jacket.
How to quickly and easily sew such a dress with your own hands
If you accurately performed the cutting and did not neglect the notches, then sewing will not cause you much trouble.
You should start, as usual, with careful ironing of the parts in pairs.
Is it worth it to process a zipper? If the fabric is completely inelastic, then the zipper is desirable. It can be processed both in the middle seam of the back (not reaching the collar), and in the middle seam of the front (detachable or not).
When processing the zipper in the left side seam, you need to take into account the position of the pocket - the end of the zipper should be at least 3-4 cm higher than the pocket, so it is better to choose between the middle seams
The next sequence looks something like this:
- Stitch and iron the tuck - allowance down.
- Overcast the middle seams of the front-back and the “vertical” seams of the sleeve (middle to the ledge), iron them.
- Baste the zipper - we will grind it after trying it on.
- Stitch the burlap pockets along the notches and overcast a fragment of the stitching seams. Iron.
- Stitch and overcast the side seams, "circling" the overcast seam around the burlap of the pockets. Iron the seams.
- Stitch and iron the seams of the sleeves.
- Baste the middle seam of the collar, stitch the shoulder seams. Iron out.
- The first sample is required. Trim the armholes to fit, attach the sleeve and mark three points for stitching. Adjust the position of the middle seam of the sleeve, based on the posture of the customer.
- Process the bottom of the sleeve.
- Sew on the collar and overstitch the collar along the edge.
- Sweep up the sleeves at the points indicated on the fitting.
- Attach lightning.
- The second fitting is optional, but desirable.
- Stitch in sleeves, overcast armholes.
- Finish the hem into an open hem (single hem with overedging).
- Finishing ironing of the product.
Download this pattern pdf:
A-line dress pattern with a middle seam
$2.00 (80 hryvnia)
Bank cards of the Russian Federation are not accepted for payment!
Size charts What is the height of the pattern Payment methods Ask a question Reviews
Vera Olkhovskaya in social networks:

See similar clothing patterns and how to sew on them


-
Any pattern for free for a review of a previously made order
More...
Lifetime promotion for buyers of patterns!

Leave a review about my store of patterns for an order that you made before, and you will receive any paid pattern of your choice Free!
Catalog:
New patterns on the site


Most readable articles
- How to print patterns in full size on sheets of any format? Category: F.A.Q.
- Pattern of a dress for a babydoll girl Category: Dress patterns for free
- How to take measurements for sewing Category: Sewing: general questions
- How to sew a skirt without darts and without a pattern: "Tatyanka" Category: How to sew...?
- How to learn to sew from scratch at home for free? Category: F.A.Q.
- Skirt with a belt - how to sew a belt to a skirt and processing the belt when sewing a skirt for beginners Category: Waist section processing with and without belt
- How to choose a pattern size? Do Olkhovskaya patterns require a fit? Category: F.A.Q.
- Do-it-yourself parsley, Cossack and Gnome according to free patterns by Vera Olkhovskaya Category: How to sew a New Year's costume and costumes for the holidays with your own hands
New lessons and reviews
-
I sewed a boho trapeze dress size 42 according to your pattern
Category: Patterns - photos and reviews from users

-
I made two dresses with this pattern.
Category: Patterns - photos and reviews from users

-
Thanks for the fast order processing.
Category: Patterns - photos and reviews from users

-
When sewing, I slightly deepened the front neck
Category: Patterns - photos and reviews from users
