 The most common and simplest option for modeling trousers is a yoke on the back half (hereinafter referred to as ZP).
It is used when cutting jeans and other types of trousers.
Initially, the use of a yoke in men's jeans was not for aesthetic reasons.
Firstly, cutting out the RFP with a yoke saved several centimeters of fabric, which is important in mass tailoring.
And secondly, it allowed to avoid darts at the waist.
Needless to say, the rejection of tucks saved time.

Two tucks had to be marked (two notches on the cut and a hole on the top), stitched, ironed and laid finishing lines.
And all this was done twice, that is, for each tuck on each RFP!
Whereas the coquette was ground, overcast and ironed.
So, let's leave the eulogies to the ingenious inventor of the denim cut and move on to modeling this very coquette.
On the RFP of the trousers, draw a yoke line (picture 1).
It is important that this line passes through the tops of the tucks or is located at a distance of no more than 1 cm from these tops.
The pattern is cut along the yoke line, and the fragments of the yoke are joined end-to-end with adhesive tape.
 Done!
Done!
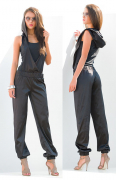
And one more example of modeling: shorts with fly-away PP in the form of a bow (picture 2).
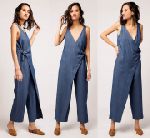
 As you may have guessed, the modeling is performed on a pattern based on ladies' trousers with tucks (picture 3).
First, we “cut off the excess” by setting the length of the model.
And we model the departure part (picture 4).
We circle the PP from the bow to the ironing (figure 4 a) and complete the shuttlecock (figure 4 b).
 It is better to do this on polyethylene, placing the original PP under a clean sheet of polyethylene.
The first experience may not be entirely successful.
Therefore, we outline the finished flying part or fasten it with pins on the figure of the customer and make adjustments.
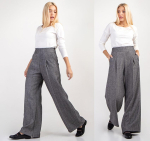
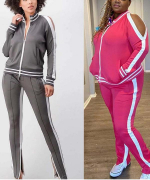
 Ready-made pattern of women's trousers in a sporty style with a yoke on the back half
The pattern is printed from a PDF file of the required range of sizes on a printer or plotter on sheets of paper A4, A3, A2, A1 or A0.
On the figure the assembly diagram is shown when printing on sheets of A4 paper patterns for sizes from 52 to 64 In figure 6 on the right - for dimensions from 40 to 52.
The pants are high-waisted, but the "darted" waistband allows the pants to be worn a little lowered. The presence of a vertical relief line on the PP of the trousers makes it possible to sew combined products that will be complimentary for large and full figures.
 Download the pattern of trousers and read the instructions on how to sew with your own hands...
A small video tutorial on sewing such trousers:


