Vera Olkhovskaya
Machine embroidery has become available to home couturier relatively recently.
I'm not talking about embroidering on grandmother's hoop, when you had to move them under the needle manually.
 This video tutorial on embroidery for beginners will talk about the process that is entirely performed by a computerized machine, and the embroidery pattern is a file designed on a computer.
The embroidery designs shown in the video were made on thick wool knitwear...
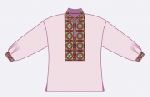
Hoodie pattern on which embroidery was carried out

I'll start from the beginning: why skulls...
Sometimes, only a good crack (which is not our method) and applied art, the language of which is understandable to a teenager, can convey the power of maternal love through the educational process.
In my opinion, it's good if the message is seasoned with a good portion of black humor and has an ambiguous meaning.
These embroideries will be located on the back and on the chest of the jersey.
Embroidery designs are downloaded for free on the embroidery forum, the link to which you see on the screen.
These machine embroidery designs are designed by Zabava. That is the name of the embroiderer - designer. Thank you very much, dear Fun! ..
And the inscriptions were heard, written down and added by me - Vera Olkhovskaya.
As a butt, a special thin embroidery interlining is used, which is located UNDER the embroidery, and on top - two layers of a special water-soluble interlining. Therefore, you see embroidery on a white background.
Since I have no embroidery experience at all, it was very difficult for me to hoop all these layers into the hoop the way I needed.
After all, embroidery should also be focused on the shared direction of the thread! .. But I got out of the situation.
I literally quilted interlinings for a small skull, laying several vertical lines. I used water soluble thread as the upper thread for these stitches.
And for a large skull, I swept all the layers with large oblique stitches ... 6-7 centimeters long.
Which way did I like best? - you ask.
Definitely the first, with quilting with water-soluble thread.
After the embroidery process is completed, I wash the fabric in cool water and rinse thoroughly.
As you can see, the water-soluble interlining dissolves, and the one under the embroidery remains ... Water-soluble threads dissolve a little later than the interlining.
The first stage of washing was very successful, and the second - hand washing in a special shampoo for wool - is very familiar to every girl and therefore I skip it.
And now the knitwear with embroidery has dried up ... it should be ironed.
It is best to iron in the grandmother’s way through a very wet iron, folded in half ... That is, we wet the coarse calico or a rather dense hebeshka right in the basin or under the tap, twist it so that it does not flow from it, shake it, fold it in half and cover it with our embroidered masterpiece.
 After ironing with small scissors, cut off the excess interlining.
 Everything seems to be... It remains to add that, using the "free stitch" function, I managed to push the boundaries of the finished design and extend the "rays" beyond the "picture".
I am very grateful to The fun that developed these drawings. Thank you for sharing them on the broidery.ru forum!
And also I am grateful to the people who inspired me to this work.
Thanks to the designers Lena Hoshek and Alexander McQueen!..
Special thanks go to the pirates who gave us the Jolly Roger...
I wish you successful sewing and more reasons to smile!
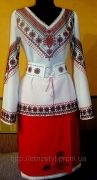
Patterns of embroidered shirts for men and women